Difference between revisions of "PPTP Tomato"
From BTGuard Wiki
| (One intermediate revision by the same user not shown) | |||
| Line 10: | Line 10: | ||
1. Connect to http://192.168.1.1/<br/> | 1. Connect to http://192.168.1.1/<br/> | ||
2. Click on '''VPN Tunneling''' then '''PPTP Client'''.<br/> | 2. Click on '''VPN Tunneling''' then '''PPTP Client'''.<br/> | ||
| − | 3. Fill in | + | 3. Fill in the following:<br/> |
<br/> | <br/> | ||
Checkmark '''Start with WAN'''<br/> | Checkmark '''Start with WAN'''<br/> | ||
| Line 19: | Line 19: | ||
Encryption: '''Maximum (128 bit only)'''<br/> | Encryption: '''Maximum (128 bit only)'''<br/> | ||
Checkmark:<br/> | Checkmark:<br/> | ||
| − | + | '''Stateless MPPE connection'''<br/> | |
'''Redirect Internet traffic'''<br/> | '''Redirect Internet traffic'''<br/> | ||
'''Create NAT on tunnel'''<br/> | '''Create NAT on tunnel'''<br/> | ||
Latest revision as of 13:33, 17 November 2014
Setup Instructions
1. Connect to http://192.168.1.1/
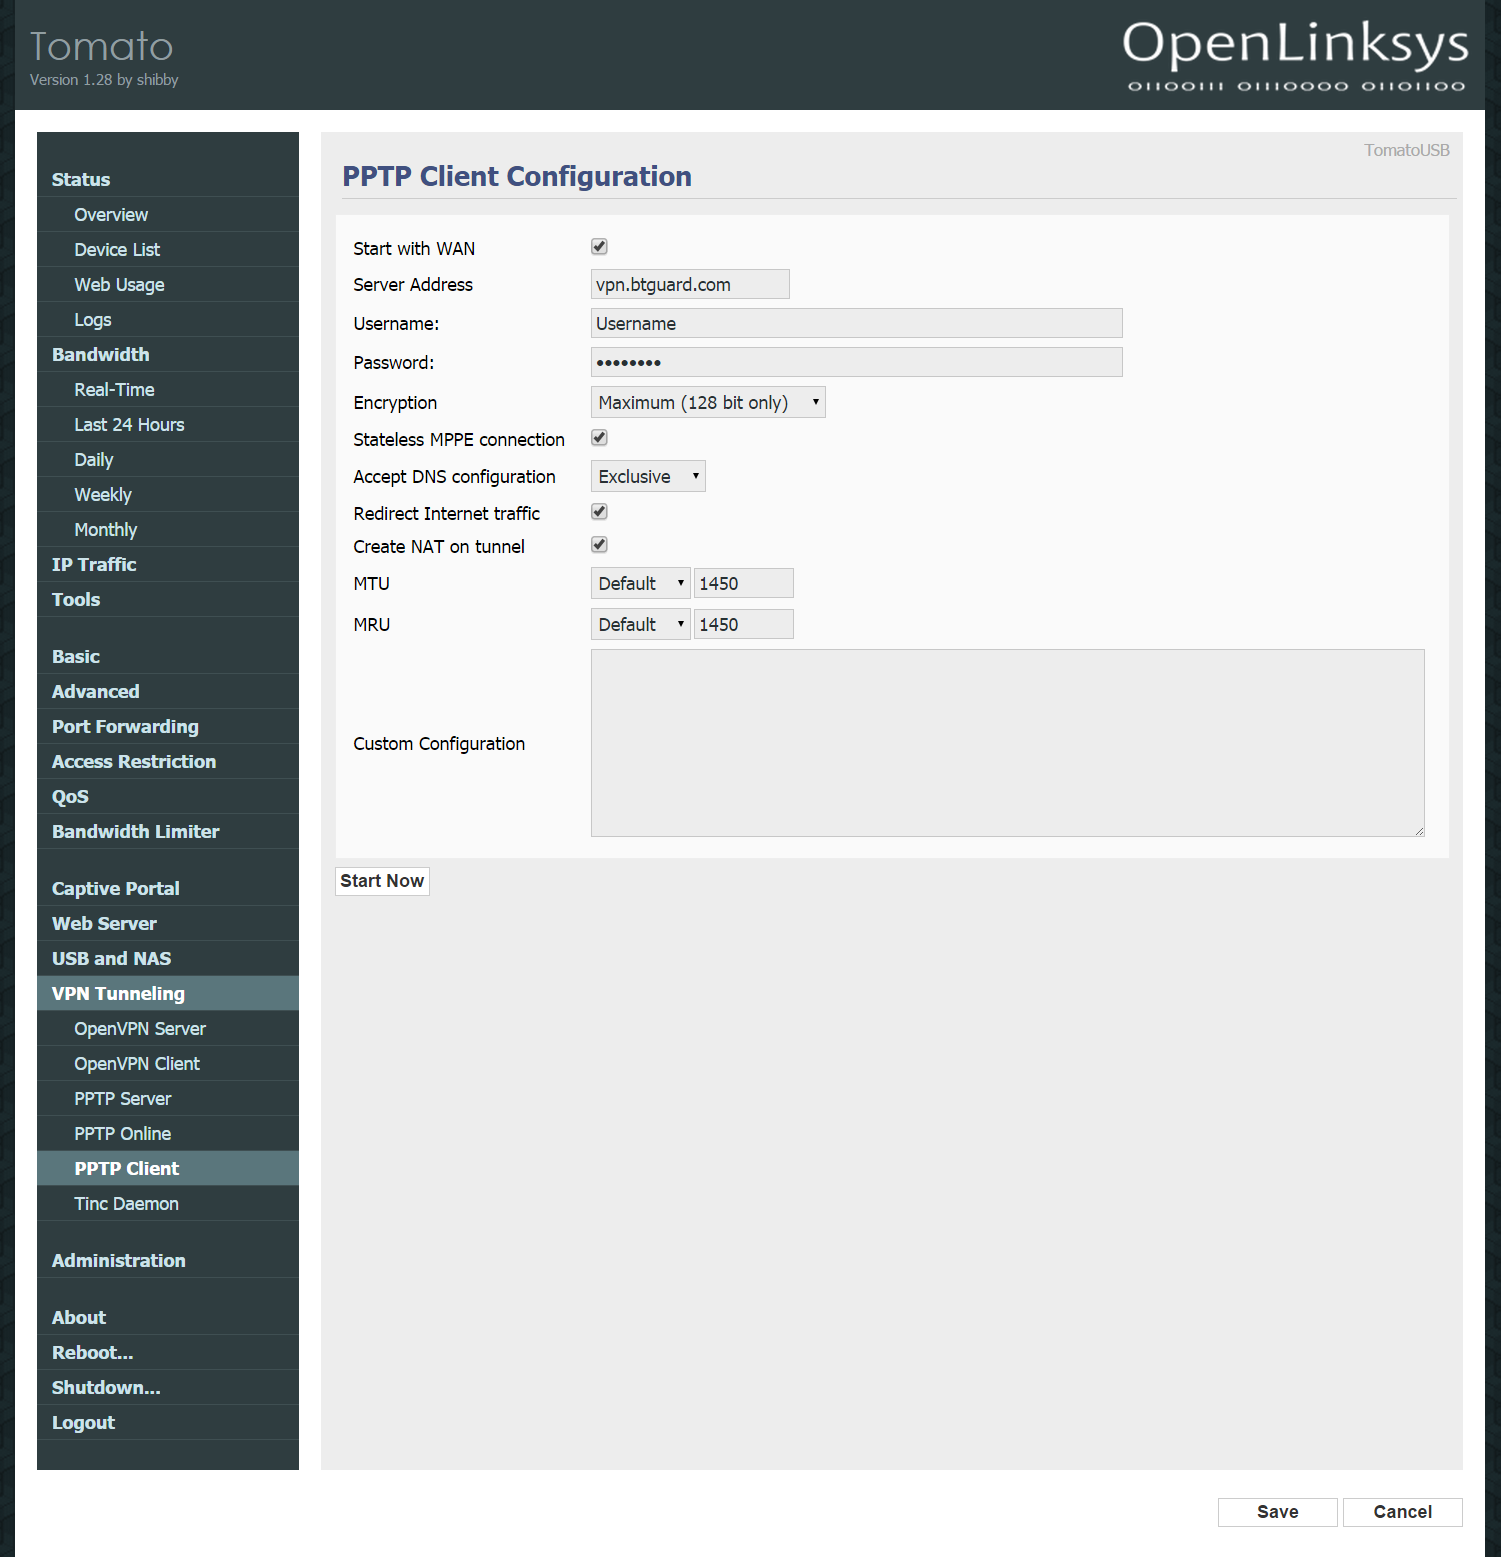
2. Click on VPN Tunneling then PPTP Client.
3. Fill in the following:
Checkmark Start with WAN
Server Address: vpn.btguard.com
Username:
Password:
Both username and password are case sensitive. Make sure not to add/forget Capital Letters.
Encryption: Maximum (128 bit only)
Checkmark:
Stateless MPPE connection
Redirect Internet traffic
Create NAT on tunnel
4. Hit Save then Start Now to connect.
