Difference between revisions of "OpenVPN Mac OS X"
From BTGuard Wiki
| Line 2: | Line 2: | ||
<div class="wrapleft"> | <div class="wrapleft"> | ||
<div class="left"> | <div class="left"> | ||
| − | <span class="plainlinks">[https://wiki.btguard.com/images/ | + | <span class="plainlinks">[https://wiki.btguard.com/images/openvpn_mac_new_1.png https://wiki.btguard.com/images/openvpn_mac_new_1.png]</span> |
</div> | </div> | ||
</div> | </div> | ||
| Line 8: | Line 8: | ||
<p> | <p> | ||
| − | == Setup Instructions == | + | == Setup Instructions for Tunnelblick 3.3 ([[OpenVPN_Mac_OS_X_old|older versions here]]) == |
| − | 1. Download | + | 1. Download the [https://sourceforge.net/projects/tunnelblick/files/All%20files/Tunnelblick_3.3.dmg/download Tunnelblick Installation File] <br/> |
| − | [https:// | + | |
<br/> | <br/> | ||
[https://code.google.com/p/tunnelblick/wiki/DownloadsEntry?tm=2 Official Download Page]<br/> | [https://code.google.com/p/tunnelblick/wiki/DownloadsEntry?tm=2 Official Download Page]<br/> | ||
| Line 23: | Line 22: | ||
<div class="wrapleft"> | <div class="wrapleft"> | ||
<div class="left"> | <div class="left"> | ||
| − | <span class="plainlinks">[https://wiki.btguard.com/images/ | + | <span class="plainlinks">[https://wiki.btguard.com/images/openvpn_mac_new_2.png https://wiki.btguard.com/images/openvpn_mac_new_2.png]</span> |
</div> | </div> | ||
</div> | </div> | ||
| Line 79: | Line 78: | ||
<div class="wrapleft"> | <div class="wrapleft"> | ||
<div class="left"> | <div class="left"> | ||
| − | <span class="plainlinks">[https://wiki.btguard.com/images/ | + | <span class="plainlinks">[https://wiki.btguard.com/images/openvpn_mac_new_3.png https://wiki.btguard.com/images/openvpn_mac_new_3.png]</span> |
</div> | </div> | ||
</div> | </div> | ||
<div class="right"> | <div class="right"> | ||
<p><br/><br/> | <p><br/><br/> | ||
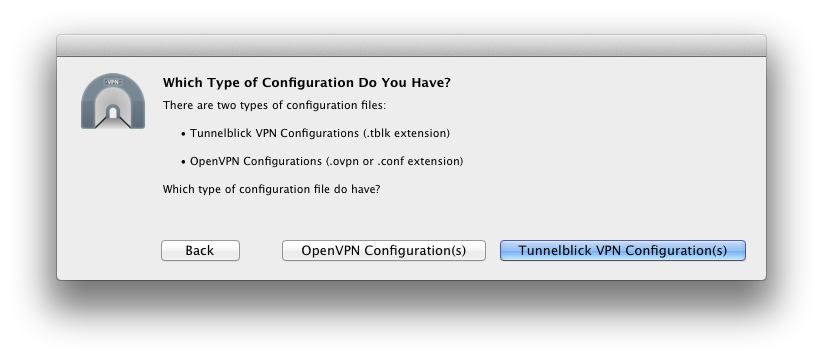
| − | 7. Click on ''' | + | 7. Click on '''Tunnelblick VPN Configuration(s)'''. |
<br/> | <br/> | ||
</p> | </p> | ||
| Line 93: | Line 92: | ||
<div class="wrapleft"> | <div class="wrapleft"> | ||
<div class="left"> | <div class="left"> | ||
| − | <span class="plainlinks">[https://wiki.btguard.com/images/ | + | <span class="plainlinks">[https://wiki.btguard.com/images/openvpn_mac_new_4.png https://wiki.btguard.com/images/openvpn_mac_new_4.png]</span> |
</div> | </div> | ||
</div> | </div> | ||
<div class="right"> | <div class="right"> | ||
<p><br/><br/> | <p><br/><br/> | ||
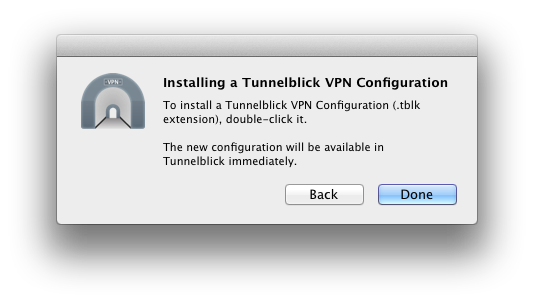
| − | 8. Click on ''' | + | 8. Click on '''Done'''. |
<br/> | <br/> | ||
</p> | </p> | ||
| Line 107: | Line 106: | ||
<div class="wrapleft"> | <div class="wrapleft"> | ||
<div class="left"> | <div class="left"> | ||
| − | <span class="plainlinks">[https://wiki.btguard.com/images/ | + | <span class="plainlinks">[https://wiki.btguard.com/images/openvpn_mac_new_5.png https://wiki.btguard.com/images/openvpn_mac_new_5.png]</span> |
</div> | </div> | ||
</div> | </div> | ||
<div class="right"> | <div class="right"> | ||
<p><br/><br/> | <p><br/><br/> | ||
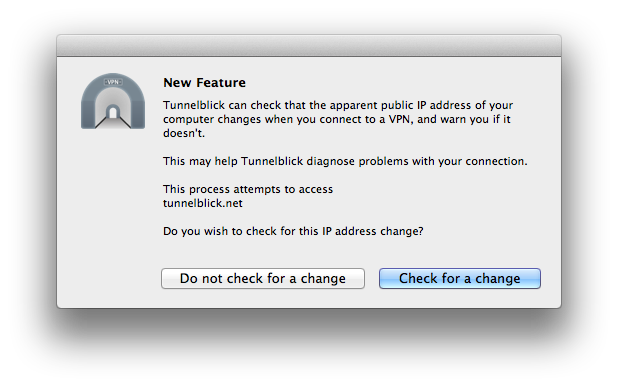
| − | 9. Click on ''' | + | 9. Click on '''Check for a change'''. |
<br/> | <br/> | ||
</p> | </p> | ||
| Line 121: | Line 120: | ||
<div class="wrapleft"> | <div class="wrapleft"> | ||
<div class="left"> | <div class="left"> | ||
| − | <span class="plainlinks">[https://wiki.btguard.com/images/ | + | <span class="plainlinks">[https://wiki.btguard.com/images/openvpn_mac_new_6.png https://wiki.btguard.com/images/openvpn_mac_new_6.png]</span> |
</div> | </div> | ||
</div> | </div> | ||
<div class="right"> | <div class="right"> | ||
<p><br/><br/> | <p><br/><br/> | ||
| − | 10. Download the [ | + | 10. Download the [http://wiki.btguard.com/uploads/openvpn-tblk.zip OpenVPN BTGuard Configuration Zip] and open it. <br/> |
<br/> | <br/> | ||
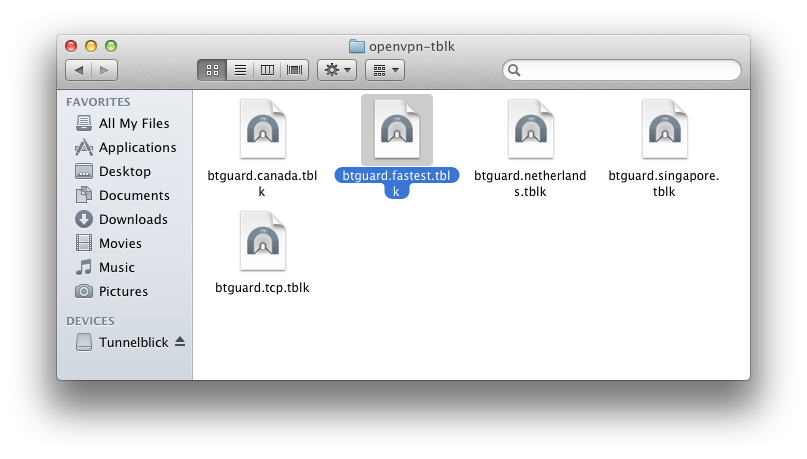
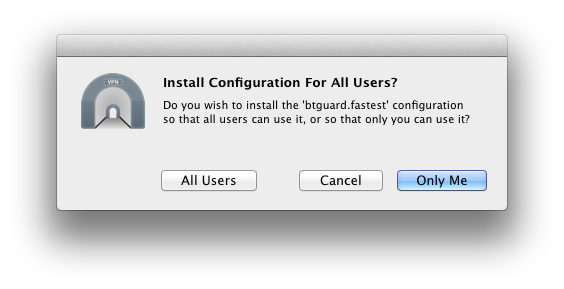
| − | 11. | + | 11. Double click on the the server you wish to connect to, for example btguard.fastest.tblk<br/> |
| − | + | ||
<br/> | <br/> | ||
| − | 12. | + | </p> |
| + | </div> | ||
| + | </div> | ||
| + | |||
| + | <div class="wrapper"> | ||
| + | <div class="wrapleft"> | ||
| + | <div class="left"> | ||
| + | <span class="plainlinks">[https://wiki.btguard.com/images/openvpn_mac_new_7.png https://wiki.btguard.com/images/openvpn_mac_new_7.png]</span> | ||
| + | </div> | ||
| + | </div> | ||
| + | <div class="right"> | ||
| + | <p><br/><br/> | ||
| + | 12. Pick whichever you prefer depending on your needs. | ||
<br/> | <br/> | ||
</p> | </p> | ||
| Line 140: | Line 150: | ||
<div class="wrapleft"> | <div class="wrapleft"> | ||
<div class="left"> | <div class="left"> | ||
| − | <span class="plainlinks">[https://wiki.btguard.com/images/ | + | <span class="plainlinks">[https://wiki.btguard.com/images/openvpn_mac_new_8.png https://wiki.btguard.com/images/openvpn_mac_new_8.png]</span> |
| + | </div> | ||
| + | </div> | ||
| + | <div class="right"> | ||
| + | <p><br/><br/> | ||
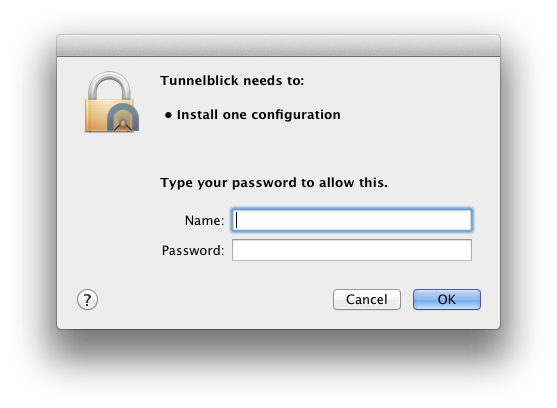
| + | 13. Enter your '''Mac password''' and hit '''OK'''. | ||
| + | <br/> | ||
| + | </p> | ||
| + | </div> | ||
| + | </div> | ||
| + | |||
| + | <div class="wrapper"> | ||
| + | <div class="wrapleft"> | ||
| + | <div class="left"> | ||
| + | <span class="plainlinks">[https://wiki.btguard.com/images/openvpn_mac_new_9.png https://wiki.btguard.com/images/openvpn_mac_new_9.png]</span> | ||
| + | </div> | ||
| + | </div> | ||
| + | <div class="right"> | ||
| + | <p><br/><br/> | ||
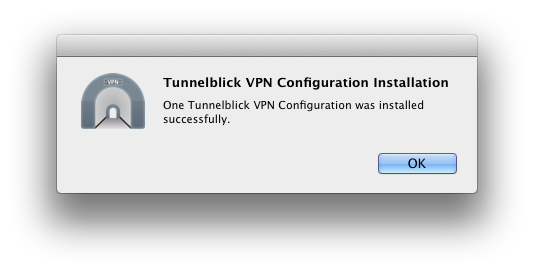
| + | 14. Click on '''OK'''.<br/> | ||
| + | <br/> | ||
| + | 15. Repeat '''steps 11''' to '''14''' for '''each''' configuration you might use. <br/> | ||
| + | </p> | ||
| + | </div> | ||
| + | </div> | ||
| + | |||
| + | |||
| + | |||
| + | <div class="wrapper"> | ||
| + | <div class="wrapleft"> | ||
| + | <div class="left"> | ||
| + | <span class="plainlinks">[https://wiki.btguard.com/images/openvpn_mac_new_10.png https://wiki.btguard.com/images/openvpn_mac_new_10.png]</span> | ||
</div> | </div> | ||
</div> | </div> | ||
<div class="right"> | <div class="right"> | ||
<p><br/><br/> | <p><br/><br/> | ||
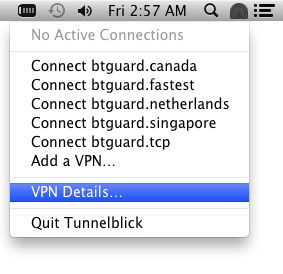
| − | + | 16. Find the Tunnelblick icon in your menu bar (top right), click on it and select '''VPN Details'''. | |
<br/> | <br/> | ||
</p> | </p> | ||
| Line 154: | Line 195: | ||
<div class="wrapleft"> | <div class="wrapleft"> | ||
<div class="left"> | <div class="left"> | ||
| − | <span class="plainlinks">[https://wiki.btguard.com/images/ | + | <span class="plainlinks">[https://wiki.btguard.com/images/openvpn_mac_new_11.png https://wiki.btguard.com/images/openvpn_mac_new_11.png]</span> |
</div> | </div> | ||
</div> | </div> | ||
<div class="right"> | <div class="right"> | ||
<p><br/><br/> | <p><br/><br/> | ||
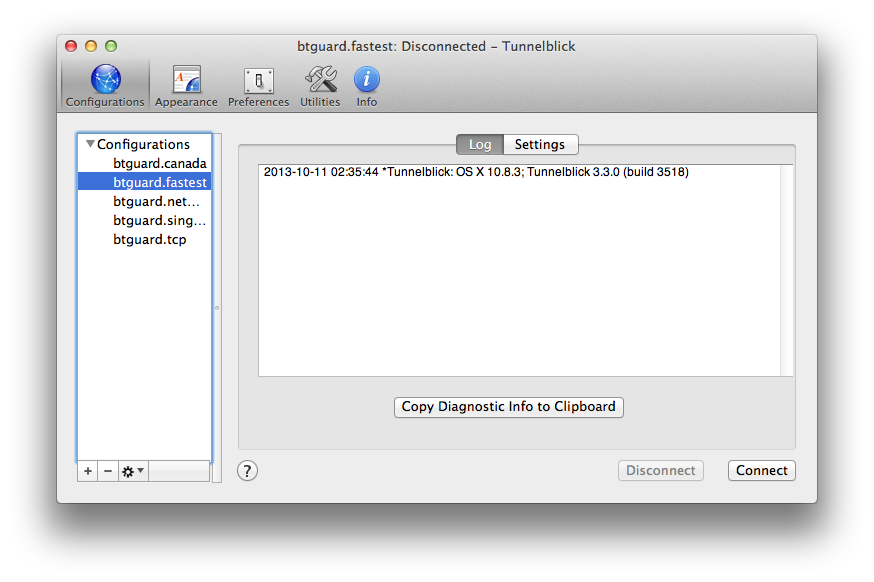
| − | + | 17. Select one of the configurations on the left and click on '''Settings'''. | |
<br/> | <br/> | ||
</p> | </p> | ||
| Line 168: | Line 209: | ||
<div class="wrapleft"> | <div class="wrapleft"> | ||
<div class="left"> | <div class="left"> | ||
| − | <span class="plainlinks">[https://wiki.btguard.com/images/ | + | <span class="plainlinks">[https://wiki.btguard.com/images/openvpn_mac_new_12.png https://wiki.btguard.com/images/openvpn_mac_new_12.png]</span> |
</div> | </div> | ||
</div> | </div> | ||
<div class="right"> | <div class="right"> | ||
<p><br/><br/> | <p><br/><br/> | ||
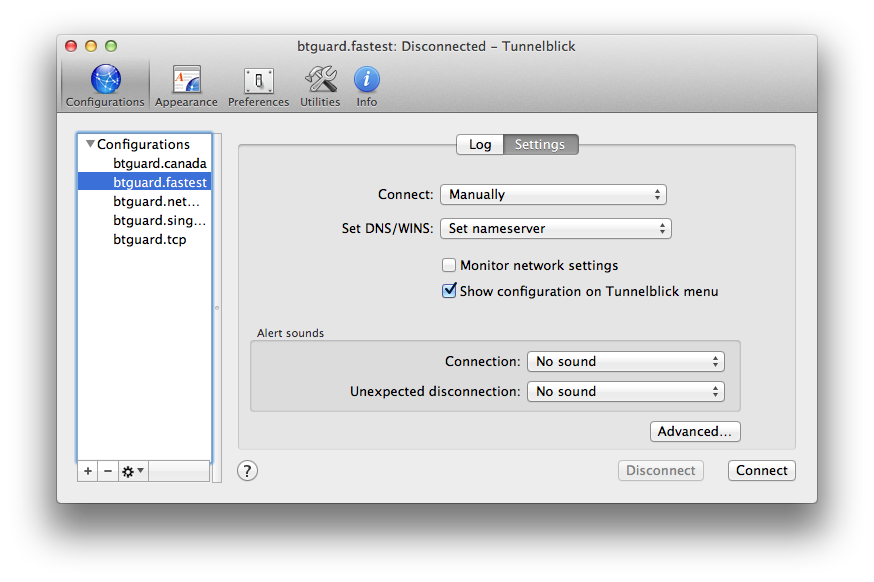
| − | + | 18. Uncheck '''Monitor network settings'''.<br/> | |
<br/> | <br/> | ||
| − | + | 19. Repeat '''steps 17''' & '''18''' for '''each''' configurations. | |
<br/><br/><br/> | <br/><br/><br/> | ||
Setup Complete! <br/> | Setup Complete! <br/> | ||
| Line 197: | Line 238: | ||
<div class="wrapleft"> | <div class="wrapleft"> | ||
<div class="left"> | <div class="left"> | ||
| − | <span class="plainlinks">[https://wiki.btguard.com/images/ | + | <span class="plainlinks">[https://wiki.btguard.com/images/openvpn_mac_new_13.png https://wiki.btguard.com/images/openvpn_mac_new_13.png]</span> |
</div> | </div> | ||
</div> | </div> | ||
| Line 216: | Line 257: | ||
<div class="wrapleft"> | <div class="wrapleft"> | ||
<div class="left"> | <div class="left"> | ||
| − | <span class="plainlinks">[https://wiki.btguard.com/images/ | + | <span class="plainlinks">[https://wiki.btguard.com/images/openvpn_mac_new_14.png https://wiki.btguard.com/images/openvpn_mac_new_14.png]</span>> |
</div> | </div> | ||
</div> | </div> | ||
Revision as of 01:19, 11 October 2013
Setup Instructions for Tunnelblick 3.3 (older versions here)
1. Download the Tunnelblick Installation File
Official Download Page
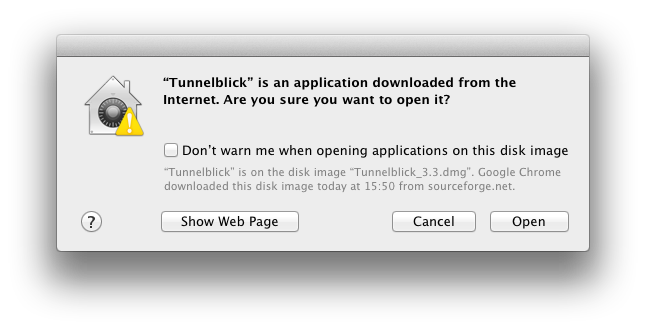
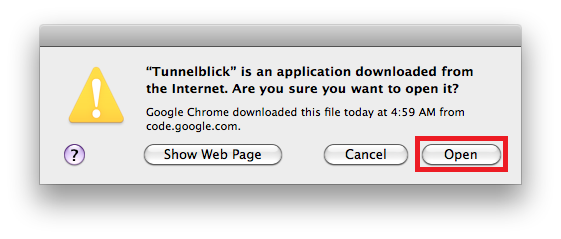
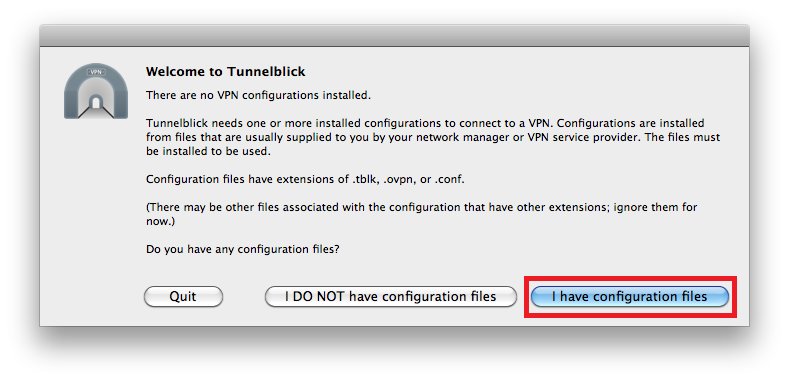
2. Run the downloaded file and click on Open.
10. Download the OpenVPN BTGuard Configuration Zip and open it.
11. Double click on the the server you wish to connect to, for example btguard.fastest.tblk
18. Uncheck Monitor network settings.
19. Repeat steps 17 & 18 for each configurations.
Setup Complete!
How To Connect
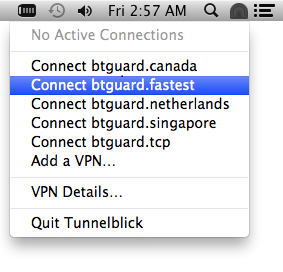
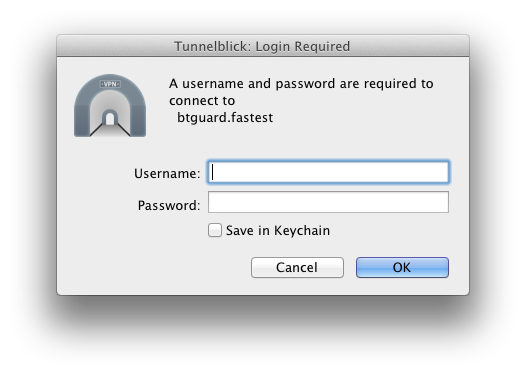
1. Click on the Tunnelblick icon in the menu bar and select Connect btguard.fastest or any of the other servers.
If BTGuard (Fastest) doesn't work, please try BTGuard (TCP). All Config files use the UDP protocol except BTGuard (TCP).
