Difference between revisions of "OpenVPN ubuntu"
From BTGuard Wiki
| Line 143: | Line 143: | ||
<div class="left"> | <div class="left"> | ||
<span class="plainlinks">[http://wiki.btguard.com/images/openvpn_ubuntu_9.png http://wiki.btguard.com/images/openvpn_ubuntu_9.png]</span> | <span class="plainlinks">[http://wiki.btguard.com/images/openvpn_ubuntu_9.png http://wiki.btguard.com/images/openvpn_ubuntu_9.png]</span> | ||
| + | <br/><br/><br/><br/><br/><br/> | ||
</div> | </div> | ||
</div> | </div> | ||
Revision as of 03:15, 4 June 2013
5. Download the BTGuard CA certificate btguard.ca.crt
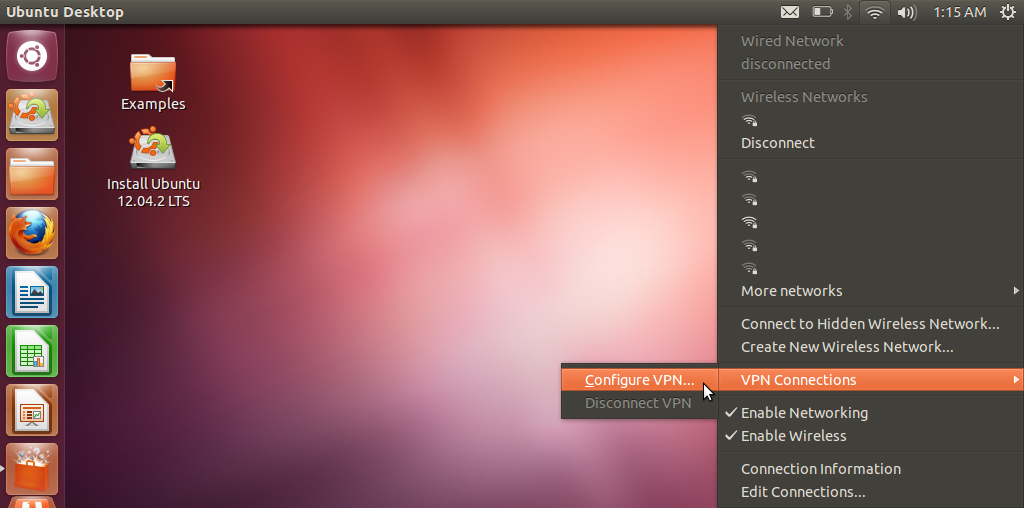
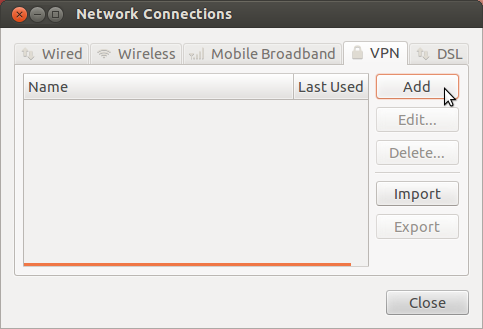
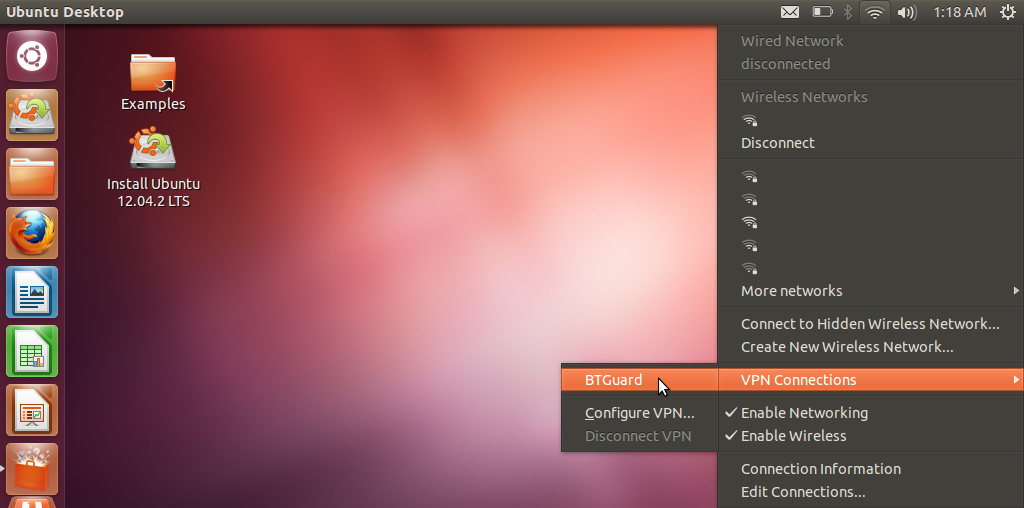
6. Click on the Network icon in the top right corner and go to VPN Connections > Configure VPN....
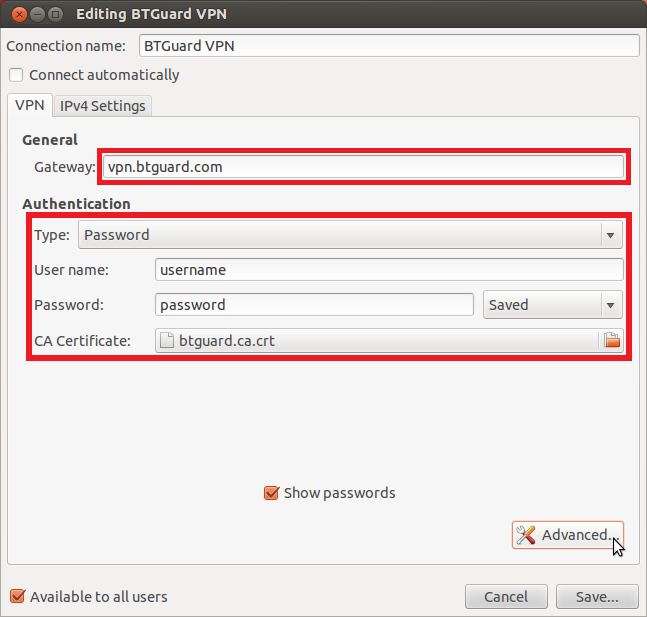
9. Enter the following information:
Gateway: vpn.btguard.com
Optional: To manually select your server location, please use ca.vpn.btguard.com for Canada or eu.vpn.btguard.com for Europe or sg.vpn.btguard.com for Singapore.
Username:
Password: Enter your password.
10. Click on the icon next to CA Certificate and locate the file btguard.ca.crt downloaded previously.
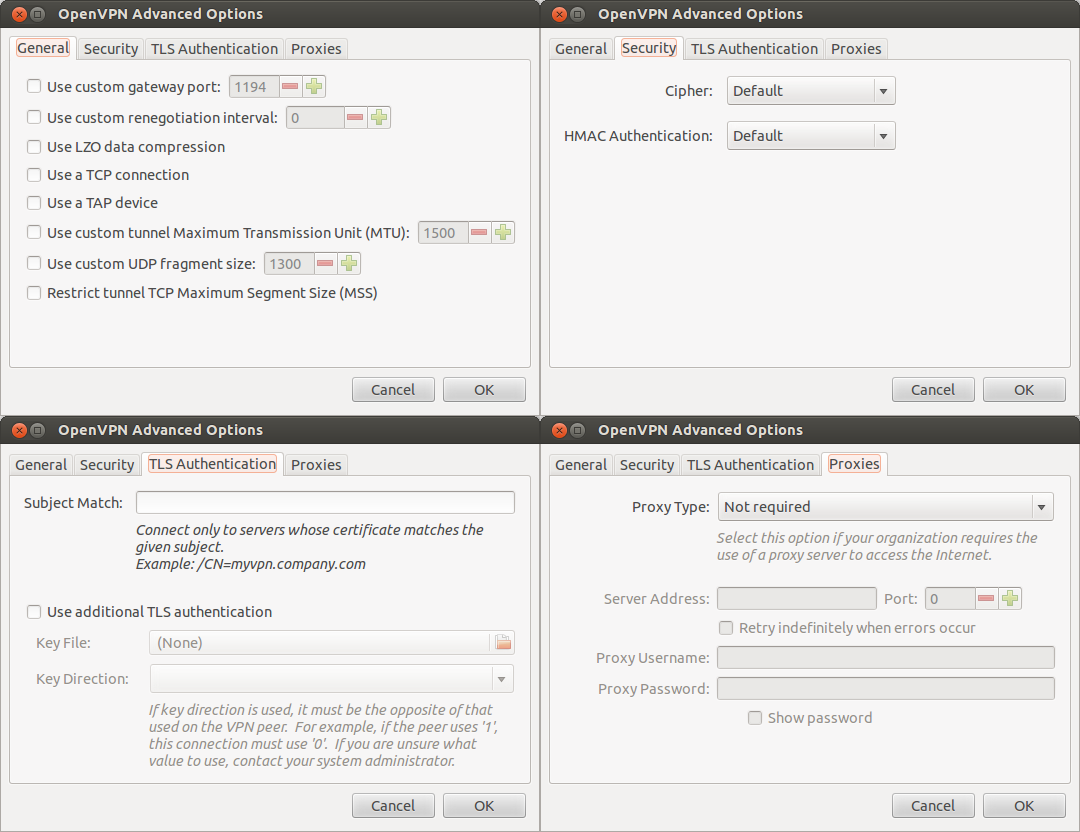
11. Click on the Advanced... button.
