Difference between revisions of "OpenVPN Config Update"
From BTGuard Wiki
(Created page with "<div class="wrapper"> <div class="wrapleft"> <div class="left"> <span class="plainlinks">[https://wiki.btguard.com/images/openvpn_win_2.png https://wiki.btguard.com/ima...") |
|||
| Line 42: | Line 42: | ||
---- | ---- | ||
<br/></div> | <br/></div> | ||
| − | |||
| Line 48: | Line 47: | ||
<div class="wrapleft"> | <div class="wrapleft"> | ||
<div class="left"> | <div class="left"> | ||
| − | <span class="plainlinks">[https://wiki.btguard.com/images/ | + | <span class="plainlinks">[https://wiki.btguard.com/images/openvpn_mac_3.7_8.png https://wiki.btguard.com/images/openvpn_mac_3.7_8.png]</span> |
</div> | </div> | ||
</div> | </div> | ||
<div class="right"> | <div class="right"> | ||
| − | <p> | + | <p><br/><br/> |
| − | + | == Windows: How to update the new Config Files == | |
| − | + | 1. Download the new [http://wiki.btguard.com/uploads/openvpn-tblk-all.zip OpenVPN BTGuard Configuration Zip] and open it. <br/> | |
| − | + | ||
| − | + | ||
| − | + | ||
| − | + | ||
| − | + | ||
| − | + | ||
| − | + | ||
| − | + | ||
| − | + | ||
| − | + | ||
| − | + | ||
| − | + | ||
| − | + | ||
| − | + | ||
<br/> | <br/> | ||
| − | '' | + | 2. Double click on '''openvpn-all.tblk'''<br/> |
<br/> | <br/> | ||
</p> | </p> | ||
| Line 76: | Line 61: | ||
</div> | </div> | ||
| − | |||
<div class="wrapper"> | <div class="wrapper"> | ||
<div class="wrapleft"> | <div class="wrapleft"> | ||
<div class="left"> | <div class="left"> | ||
| − | <span class="plainlinks">[https://wiki.btguard.com/images/ | + | <span class="plainlinks">[https://wiki.btguard.com/images/openvpn_mac_3.7_10.png https://wiki.btguard.com/images/openvpn_mac_3.7_10.png]</span> |
| + | <span class="plainlinks">[https://wiki.btguard.com/images/openvpn_mac_3.7_11.png https://wiki.btguard.com/images/openvpn_mac_3.7_11.png]</span> | ||
</div> | </div> | ||
</div> | </div> | ||
<div class="right"> | <div class="right"> | ||
| − | <p> | + | <p><br/><br/> |
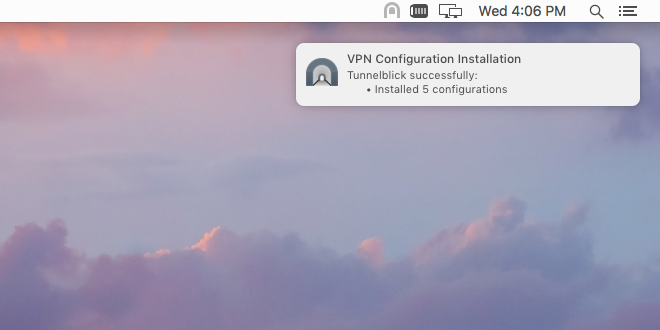
| − | 3. Enter your | + | 3. Enter your '''Mac password''' and hit '''OK'''. |
| − | + | ||
<br/> | <br/> | ||
| + | Your configuration files have been automatically replaced. | ||
| − | |||
| − | |||
| − | |||
<br/> | <br/> | ||
</p> | </p> | ||
</div> | </div> | ||
</div> | </div> | ||
Revision as of 19:22, 5 August 2020
Windows: How to update the new Config Files
1. Download the new OpenVPN BTGuard Configuration executable file.(ZIP).
2. Open openvpn_auto_config.exe.
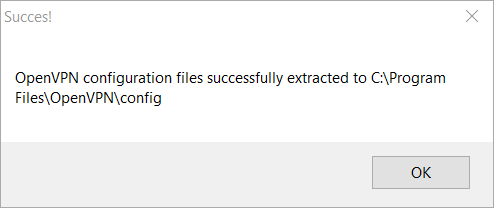
3. Click on Ok.
4. Go to C:\Program Files\OpenVPN\Config
If non-existant then go to C:\Program Files (x86)\OpenVPN\Config
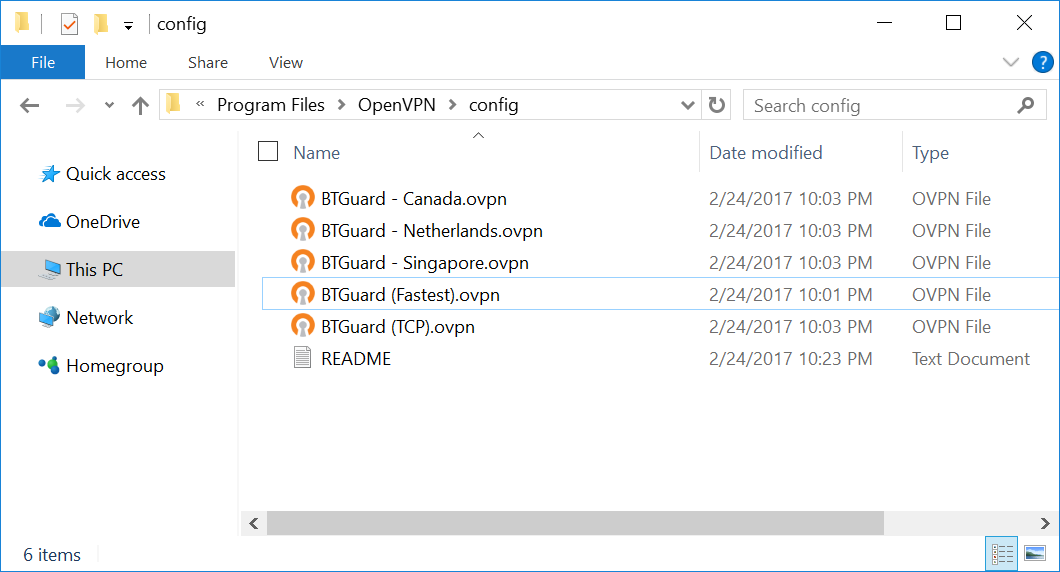
You should have the following files in the Config folder.
If the Self-Extractor didn't work, download the ZIP file and move those files manually.
If it won't allow you to unzip the files directly in the Config folder, try extracting them to the desktop then moving them to the folder
Windows: How to update the new Config Files
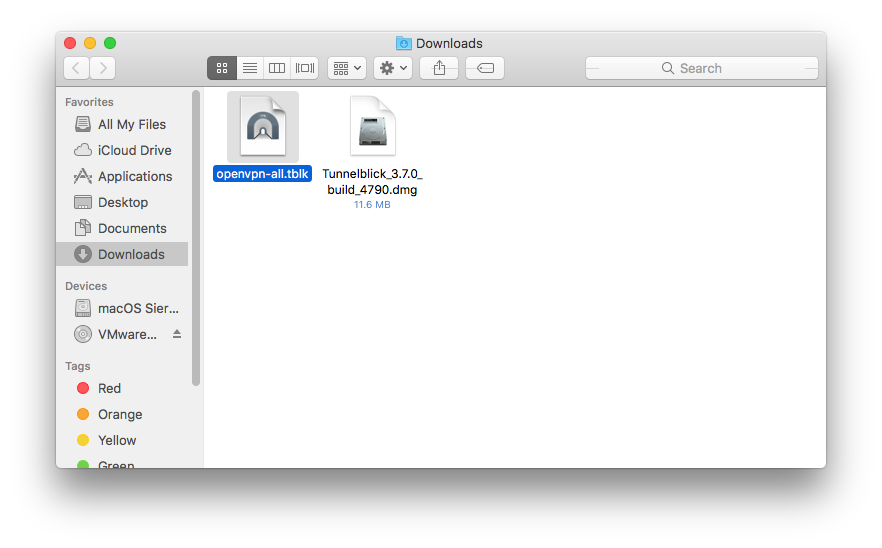
1. Download the new OpenVPN BTGuard Configuration Zip and open it.
2. Double click on openvpn-all.tblk
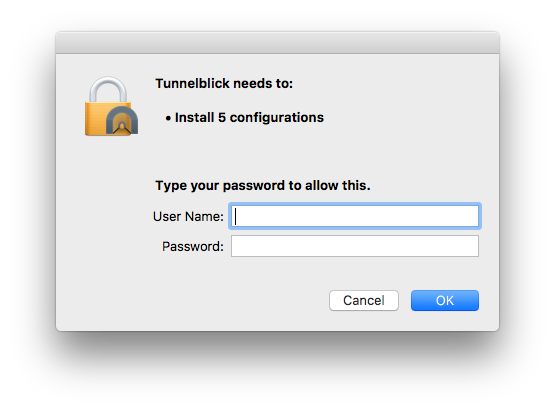
3. Enter your Mac password and hit OK.
Your configuration files have been automatically replaced.