Difference between revisions of "OpenVPN Mac OS X"
From BTGuard Wiki
| Line 23: | Line 23: | ||
</div> | </div> | ||
<div class="right"> | <div class="right"> | ||
| − | <p> | + | <p><br/><br/> |
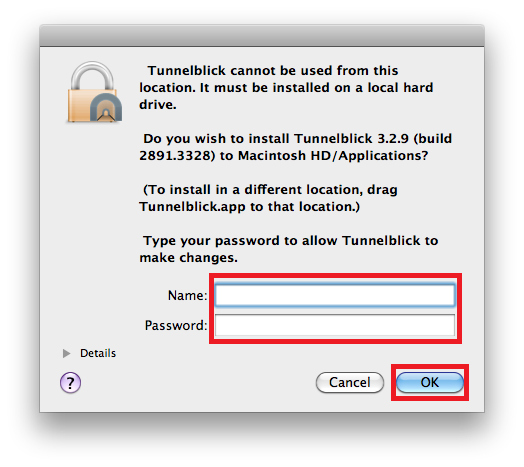
3. Enter your '''Mac password''' and hit '''OK'''. | 3. Enter your '''Mac password''' and hit '''OK'''. | ||
<br/> | <br/> | ||
| Line 37: | Line 37: | ||
</div> | </div> | ||
<div class="right"> | <div class="right"> | ||
| − | <p> | + | <p><br/><br/> |
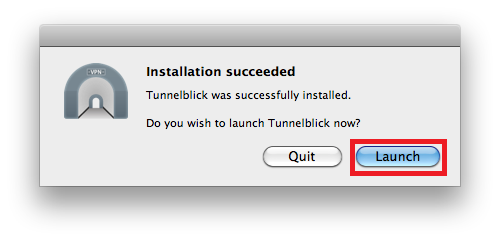
4. Click on '''Launch'''. | 4. Click on '''Launch'''. | ||
<br/> | <br/> | ||
| Line 51: | Line 51: | ||
</div> | </div> | ||
<div class="right"> | <div class="right"> | ||
| − | <p> | + | <p><br/><br/> |
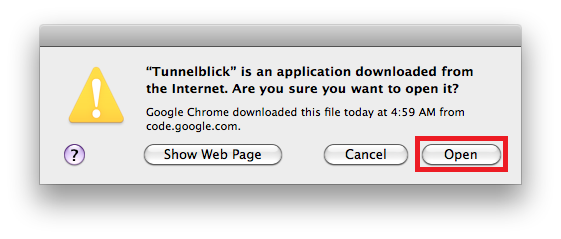
5. Click on '''Open'''. | 5. Click on '''Open'''. | ||
<br/> | <br/> | ||
| Line 65: | Line 65: | ||
</div> | </div> | ||
<div class="right"> | <div class="right"> | ||
| − | <p> | + | <p><br/><br/> |
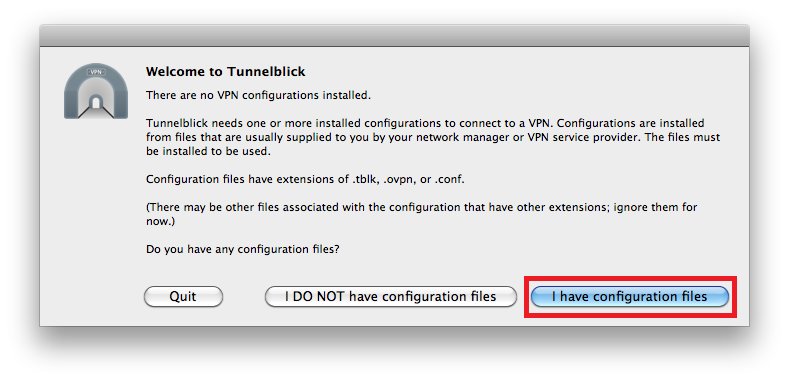
6. Click on '''I have configuration files'''. | 6. Click on '''I have configuration files'''. | ||
<br/> | <br/> | ||
| Line 79: | Line 79: | ||
</div> | </div> | ||
<div class="right"> | <div class="right"> | ||
| − | <p> | + | <p><br/><br/> |
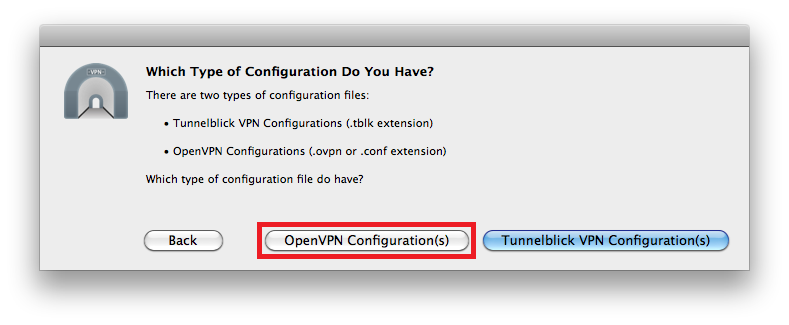
7. Click on '''OpenVPN Configuration(s)'''. | 7. Click on '''OpenVPN Configuration(s)'''. | ||
<br/> | <br/> | ||
| Line 93: | Line 93: | ||
</div> | </div> | ||
<div class="right"> | <div class="right"> | ||
| − | <p> | + | <p><br/><br/> |
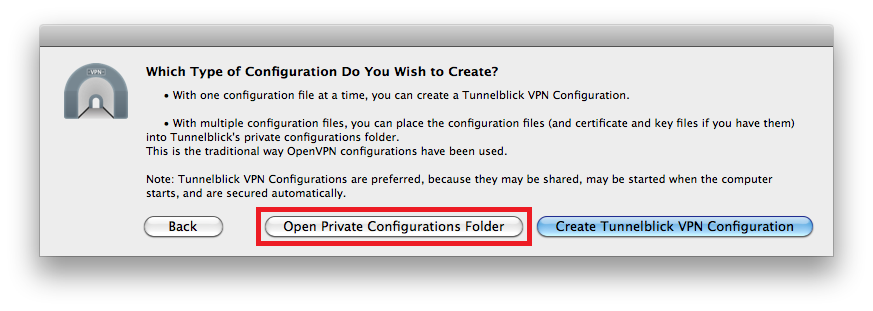
8. Click on '''Open Private Configurations Folder'''. | 8. Click on '''Open Private Configurations Folder'''. | ||
<br/> | <br/> | ||
| Line 107: | Line 107: | ||
</div> | </div> | ||
<div class="right"> | <div class="right"> | ||
| − | <p> | + | <p><br/><br/> |
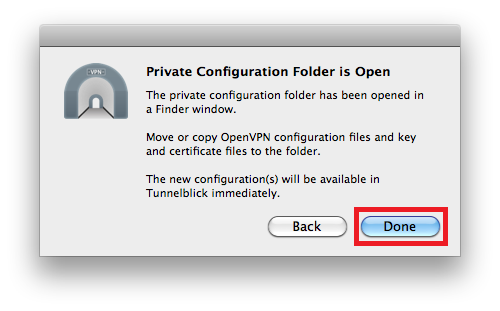
9. Click on '''Done'''. | 9. Click on '''Done'''. | ||
<br/> | <br/> | ||
| Line 121: | Line 121: | ||
</div> | </div> | ||
<div class="right"> | <div class="right"> | ||
| − | <p> | + | <p><br/><br/> |
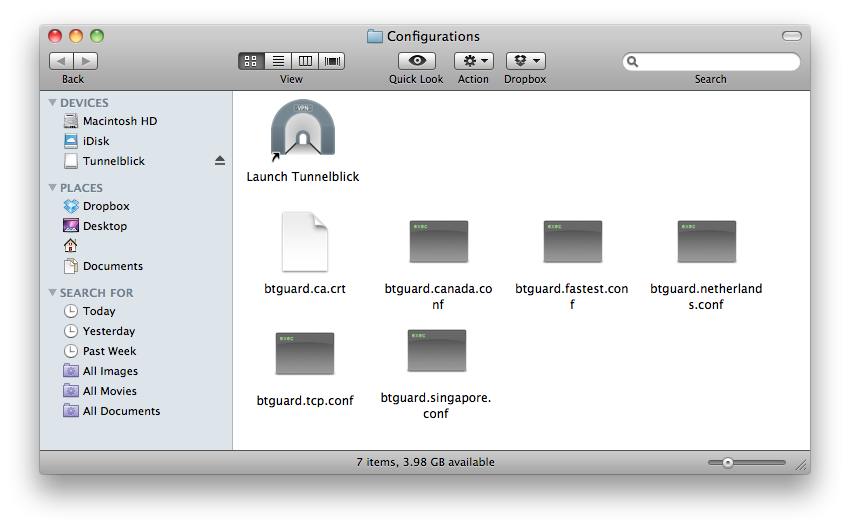
10. Download the [https://btguard.com/openvpn-config.zip OpenVPN BTGuard Configuration Zip] and open it. <br/> | 10. Download the [https://btguard.com/openvpn-config.zip OpenVPN BTGuard Configuration Zip] and open it. <br/> | ||
| − | 11. Select '''all contents''' of the ZIP folder and | + | 11. Select '''all contents''' of the ZIP folder and move them to the open '''Tunnelblick Configurations window''' to copy them to there.<br/> |
12. Close the Tunnelblick configuration Finder window. | 12. Close the Tunnelblick configuration Finder window. | ||
<br/> | <br/> | ||
Revision as of 15:56, 25 May 2013
Setup Instructions
1. Download Tunnelblick for Mac OSX 10.8 or for Mac OSX 10.7 and below
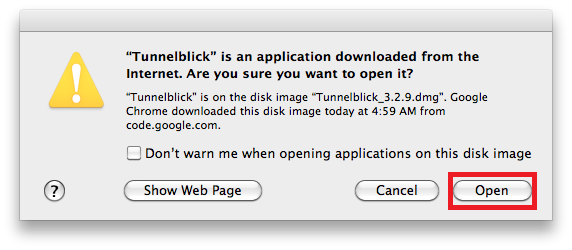
2. Run the downloaded file and click on Open.
10. Download the OpenVPN BTGuard Configuration Zip and open it.
11. Select all contents of the ZIP folder and move them to the open Tunnelblick Configurations window to copy them to there.
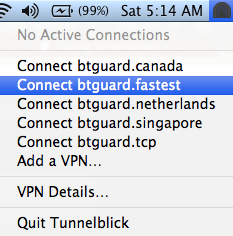
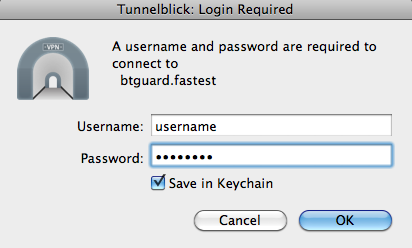
12. Close the Tunnelblick configuration Finder window.
