Difference between revisions of "OpenVPN dd-wrt"
| Line 14: | Line 14: | ||
''Both username and password are case sensitive.'' <br/> | ''Both username and password are case sensitive.'' <br/> | ||
''If UDP doesn't work, please type tcp instead of udp.'' <br/> | ''If UDP doesn't work, please type tcp instead of udp.'' <br/> | ||
| − | Optional: To manually select your server location, please use ca.vpn.btguard.com for Canada or eu.vpn.btguard.com for Europe or sg.vpn.btguard.com for Singapore. <br/> | + | Optional: To manually select your server location, please use '''ca.vpn.btguard.com''' for Canada or '''eu.vpn.btguard.com''' for Europe or '''sg.vpn.btguard.com''' for Singapore. <br/> |
5. Click on '''Save Startup'''. <br/> | 5. Click on '''Save Startup'''. <br/> | ||
</p> | </p> | ||
Revision as of 21:46, 21 May 2013
Setup Instructions
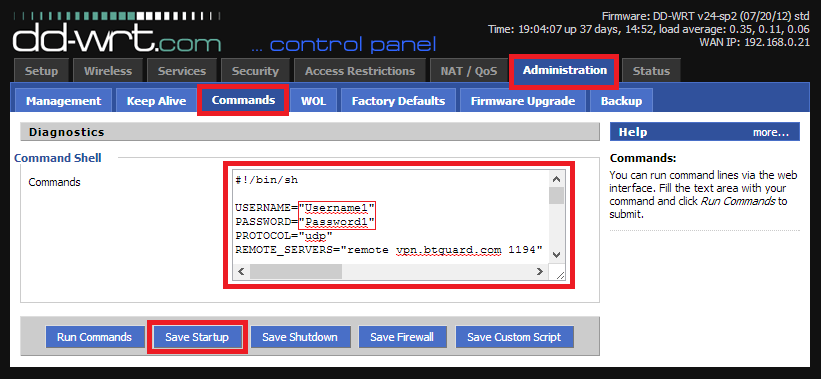
1. Connect and Log into your router by going to http://192.168.1.1/ or http://192.168.0.1/
2. Click on the Administration tab and then on Commands.
3. Copy the whole content of the ddwrt_btguard.txt file in the Command Shell.
4. Type in your username and password.
Both username and password are case sensitive.
If UDP doesn't work, please type tcp instead of udp.
Optional: To manually select your server location, please use ca.vpn.btguard.com for Canada or eu.vpn.btguard.com for Europe or sg.vpn.btguard.com for Singapore.
5. Click on Save Startup.
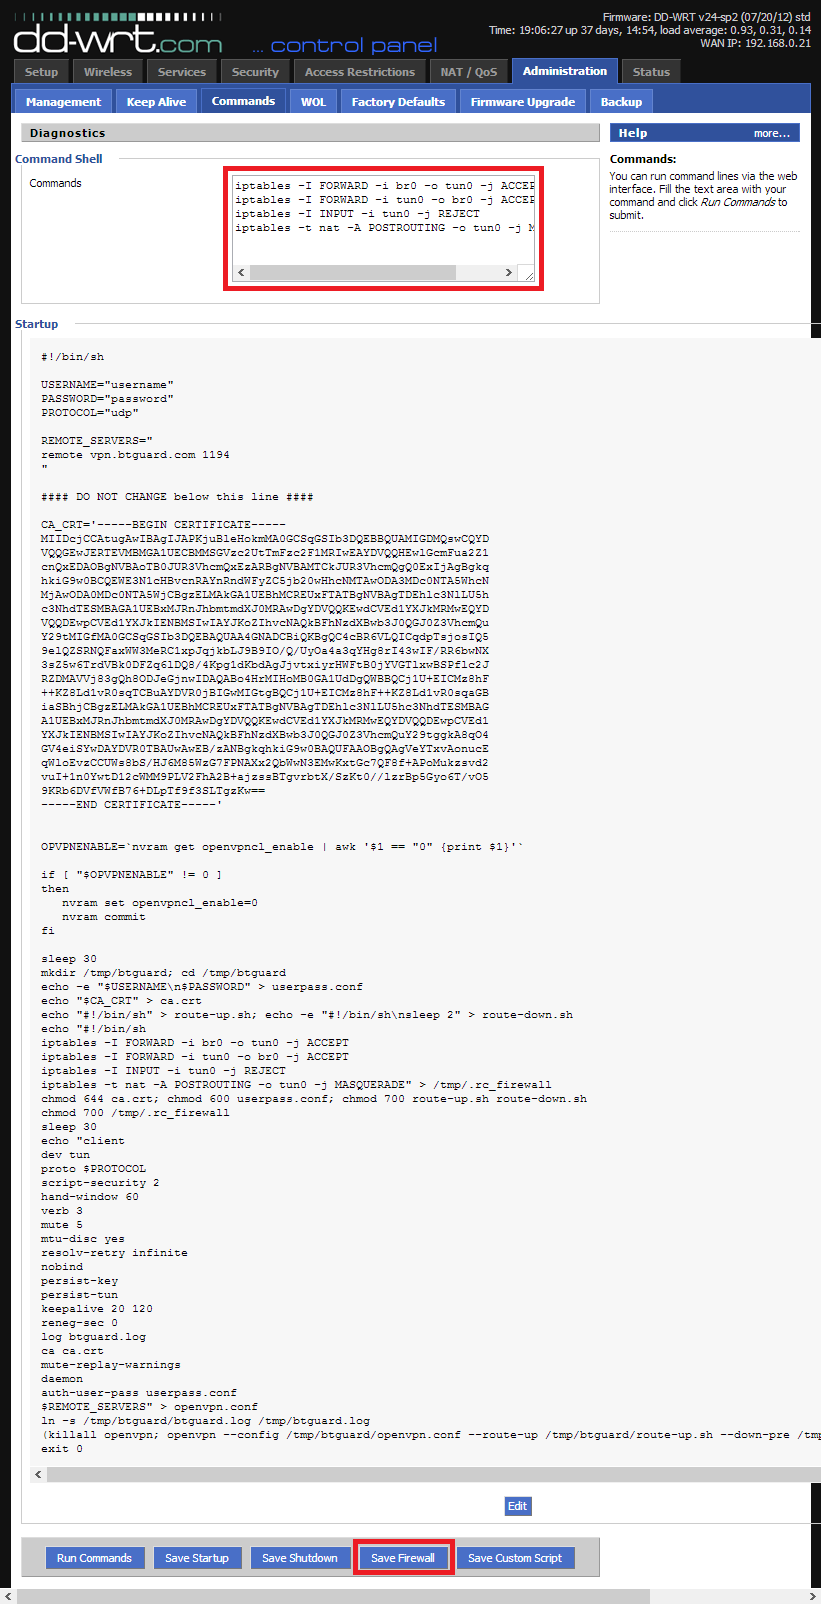
6. Copy the whole content of the ddwrt_firewall.txt file in the Command Shell.
7. Click on Save Firewall
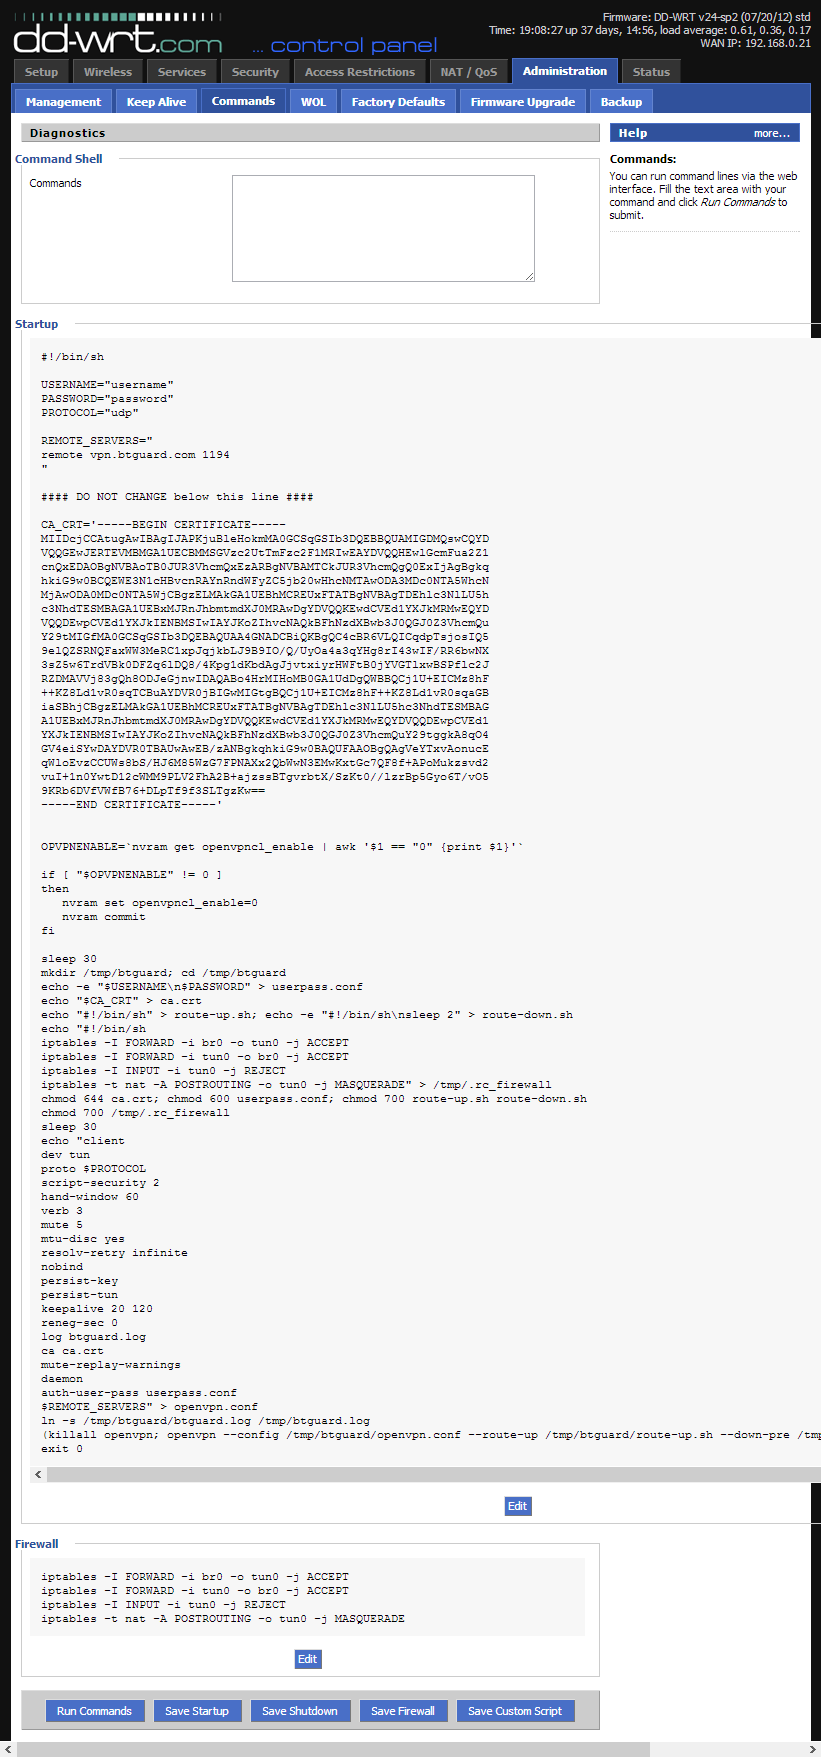
8. Your settings should look like this.
Please make sure your username and password are typed in correctly! Both are case sensitive.
9. Now click on the Management tab, go to the bottom of the page and click on Reboot Router.
Setup Complete!
The router will reboot and it will take it a minute or two to finish setting everything up.