OpenVPN dd-wrt
PLEASE READ THROUGH THIS WHOLE ARTICLE! YOU RISK BREAKING YOUR ROUTER WHEN USING A CUSTOM FIRMWARE! PROCEED CAREFULLY AND MAKE SURE YOUR ROUTER IS COMPATIBLE! PLEASE READ THROUGH THIS WHOLE ARTICLE! YOU RISK BREAKING YOUR ROUTER WHEN USING A CUSTOM FIRMWARE! PROCEED CAREFULLY AND MAKE SURE YOUR ROUTER IS COMPATIBLE!
REQUIREMENTS
These instructions are ONLY for people who already have a dd-wrt compatible router flashed with the latest version.
In this tutorial, a DIR-825 rev. B2 was used. Firmware: DD-WRT v24-sp2 (05/27/13) std.
If you're having issues with OpenVPN, please try the PPTP method.
Setup Instructions
1. Connect and Log into your router by going to http://192.168.1.1/ or http://192.168.0.1/
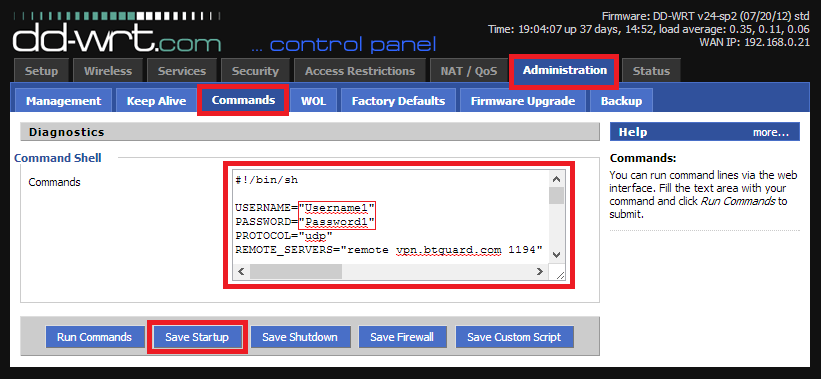
2. Click on the Administration tab and then on Commands.
3. Copy the whole content of the ddwrt_btguard.txt file in the Command Shell.
ZIP with both .txt files
- !/bin/sh
USERNAME="replace with your username" PASSWORD="replace with your password" PROTOCOL="udp"
REMOTE_SERVERS=" remote vpn.btguard.com 1194 "
- DO NOT CHANGE below this line ####
CA_CRT='-----BEGIN CERTIFICATE----- MIIDcjCCAtugAwIBAgIJAPKjuBleHokmMA0GCSqGSIb3DQEBBQUAMIGDMQswCQYD VQQGEwJERTEVMBMGA1UECBMMSGVzc2UtTmFzc2F1MRIwEAYDVQQHEwlGcmFua2Z1 cnQxEDAOBgNVBAoTB0JUR3VhcmQxEzARBgNVBAMTCkJUR3VhcmQgQ0ExIjAgBgkq hkiG9w0BCQEWE3N1cHBvcnRAYnRndWFyZC5jb20wHhcNMTAwODA3MDc0NTA5WhcN MjAwODA0MDc0NTA5WjCBgzELMAkGA1UEBhMCREUxFTATBgNVBAgTDEhlc3NlLU5h c3NhdTESMBAGA1UEBxMJRnJhbmtmdXJ0MRAwDgYDVQQKEwdCVEd1YXJkMRMwEQYD VQQDEwpCVEd1YXJkIENBMSIwIAYJKoZIhvcNAQkBFhNzdXBwb3J0QGJ0Z3VhcmQu Y29tMIGfMA0GCSqGSIb3DQEBAQUAA4GNADCBiQKBgQC4cBR6VLQICqdpTsjosIQ5 9elQZSRNQFaxWW3MeRC1xpJqjkbLJ9B9IO/Q/UyOa4a3qYHg8rI43wIF/RR6bwNX 3sZ5w6TrdVBk0DFZq6lDQ8/4Kpg1dKbdAgJjvtxiyrHWFtB0jYVGTlxwBSPflc2J RZDMAVVj83gQh8ODJeGjnwIDAQABo4HrMIHoMB0GA1UdDgQWBBQCj1U+EICMz8hF ++KZ8Ld1vR0sqTCBuAYDVR0jBIGwMIGtgBQCj1U+EICMz8hF++KZ8Ld1vR0sqaGB iaSBhjCBgzELMAkGA1UEBhMCREUxFTATBgNVBAgTDEhlc3NlLU5hc3NhdTESMBAG A1UEBxMJRnJhbmtmdXJ0MRAwDgYDVQQKEwdCVEd1YXJkMRMwEQYDVQQDEwpCVEd1 YXJkIENBMSIwIAYJKoZIhvcNAQkBFhNzdXBwb3J0QGJ0Z3VhcmQuY29tggkA8qO4 GV4eiSYwDAYDVR0TBAUwAwEB/zANBgkqhkiG9w0BAQUFAAOBgQAgVeYTxvAonucE qWloEvzCCUWs8bS/HJ6M85WzG7FPNAXx2QbWwN3EMwKxtGc7QF8f+APoMukzsvd2 vuI+1n0YwtD12cWMM9PLV2FhA2B+ajzssBTgvrbtX/SzKt0//lzrBp5Gyo6T/vO5 9KRb6DVfVWfB76+DLpTf9f3SLTgzKw==
END CERTIFICATE-----'
OPVPNENABLE=`nvram get openvpncl_enable | awk '$1 == "0" {print $1}'`
if [ "$OPVPNENABLE" != 0 ] then
  nvram set openvpncl_enable=0
  nvram commit
fi
sleep 30 mkdir /tmp/btguard; cd /tmp/btguard echo -e "$USERNAME\n$PASSWORD" > userpass.conf echo "$CA_CRT" > ca.crt echo "#!/bin/sh" > route-up.sh; echo -e "#!/bin/sh\nsleep 2" > route-down.sh echo "#!/bin/sh iptables -I FORWARD -i br0 -o tun0 -j ACCEPT iptables -I FORWARD -i tun0 -o br0 -j ACCEPT iptables -I INPUT -i tun0 -j REJECT iptables -t nat -A POSTROUTING -o tun0 -j MASQUERADE" > /tmp/.rc_firewall chmod 644 ca.crt; chmod 600 userpass.conf; chmod 700 route-up.sh route-down.sh chmod 700 /tmp/.rc_firewall sleep 30 echo "client dev tun proto $PROTOCOL script-security 2 hand-window 60 verb 3 mute 5 mtu-disc yes resolv-retry infinite nobind persist-key persist-tun keepalive 20 120 reneg-sec 0 log btguard.log ca ca.crt mute-replay-warnings daemon auth-user-pass userpass.conf $REMOTE_SERVERS" > openvpn.conf ln -s /tmp/btguard/btguard.log /tmp/btguard.log (killall openvpn; openvpn --config /tmp/btguard/openvpn.conf --route-up /tmp/btguard/route-up.sh --down-pre /tmp/btguard/route-down.sh) & exit 0
4. Type in your username and password.
Both username and password are case sensitive.
If UDP doesn't work, please type tcp instead of udp.
5. Click on Save Startup.
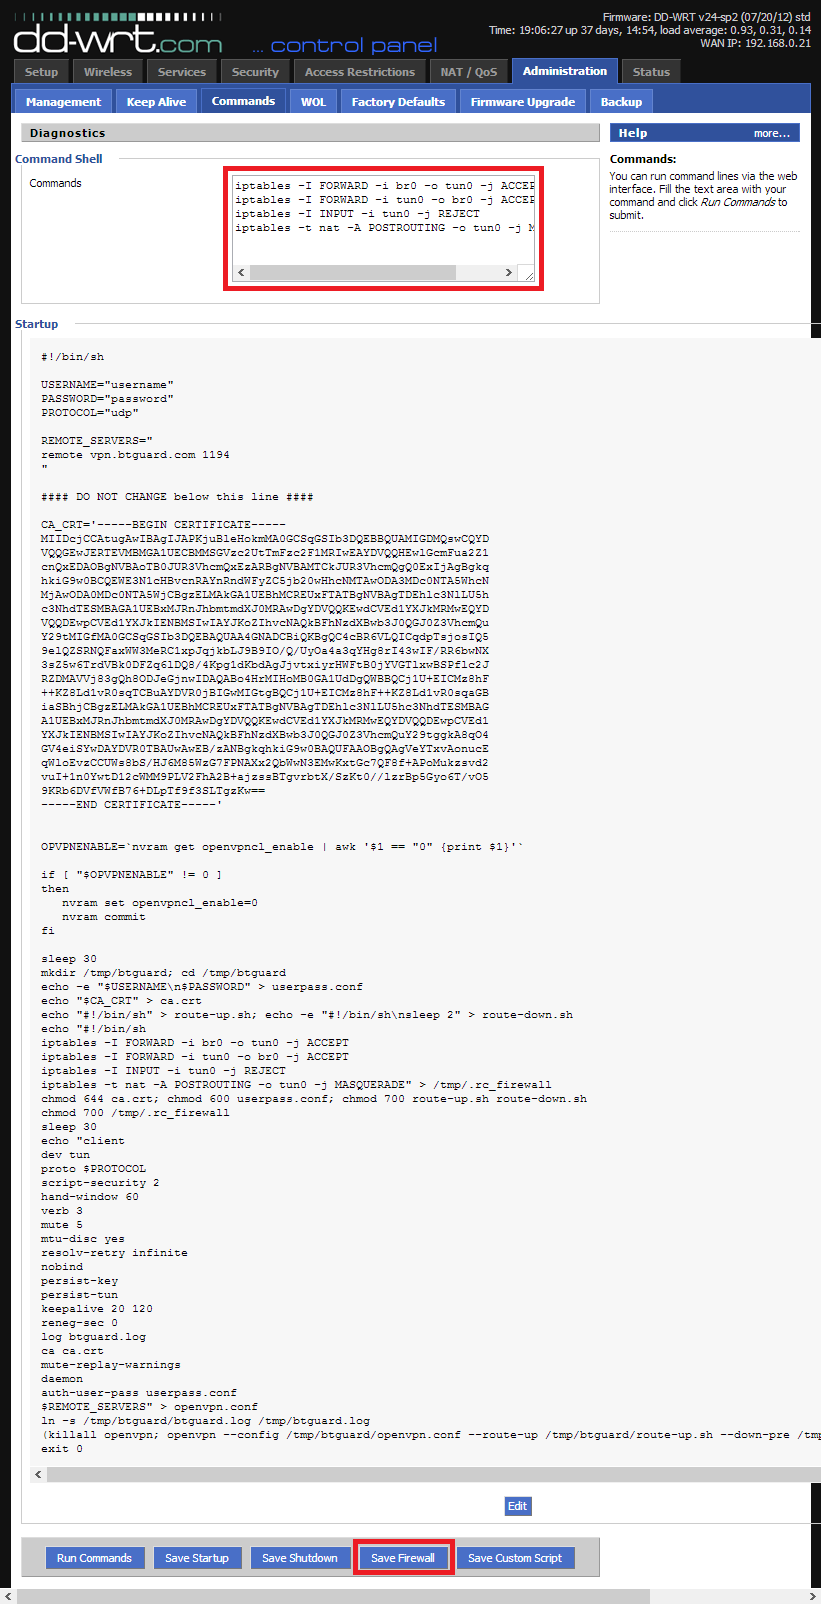
6. Copy the whole content of the ddwrt_firewall.txt file in the Command Shell.
7. Click on Save Firewall
- ddwrt_btguard.txt Full Content:
START
END
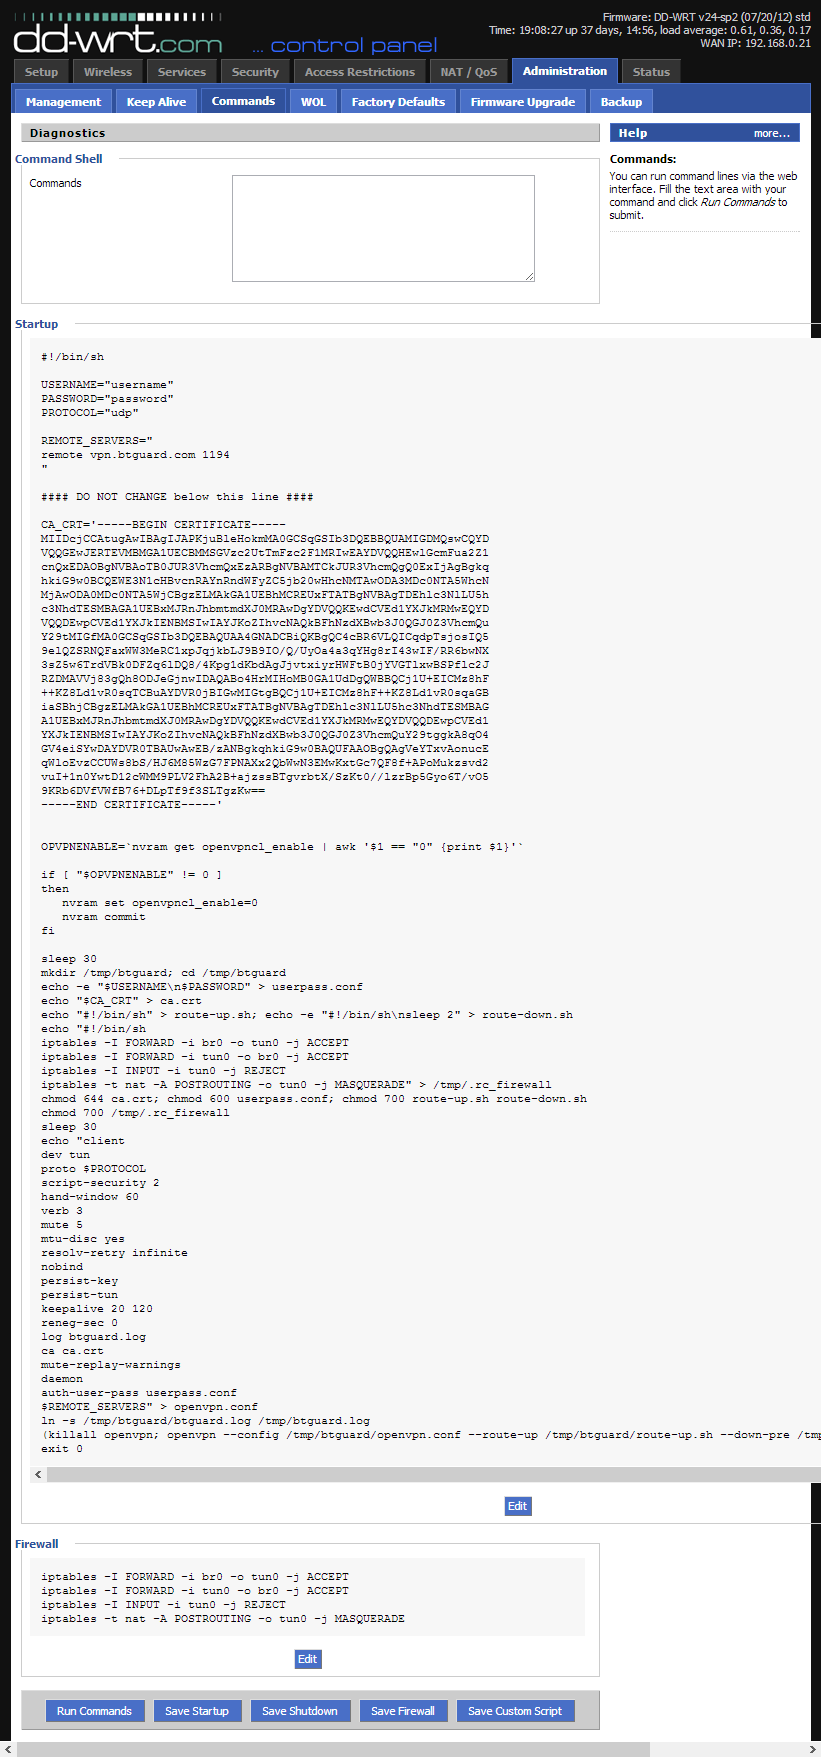
8. Your settings should look like this.
Please make sure your username and password are typed in correctly! Both are case sensitive.
9. Now click on the Management tab, go to the bottom of the page and click on Reboot Router.
Setup Complete!
The router will reboot and it will take it a minute or two to finish setting everything up.