Difference between revisions of "OpenVPN ubuntu"
| Line 142: | Line 142: | ||
<div class="wrapleft"> | <div class="wrapleft"> | ||
<div class="left"> | <div class="left"> | ||
| − | + | <span class="plainlinks">[http://wiki.btguard.com/images/openvpn_ubuntu_9.png http://wiki.btguard.com/images/openvpn_ubuntu_9.png]</span> | |
</div> | </div> | ||
</div> | </div> | ||
| Line 161: | Line 161: | ||
<div class="wrapleft"> | <div class="wrapleft"> | ||
<div class="left"> | <div class="left"> | ||
| − | + | <span class="plainlinks">[http://wiki.btguard.com/images/openvpn_ubuntu_10.png http://wiki.btguard.com/images/openvpn_ubuntu_10.png]</span> | |
</div> | </div> | ||
</div> | </div> | ||
Revision as of 03:15, 4 June 2013
Setup Instructions
1. Open Terminal

2. Type: sudo apt-get install network-manager-openvpn and hit Enter
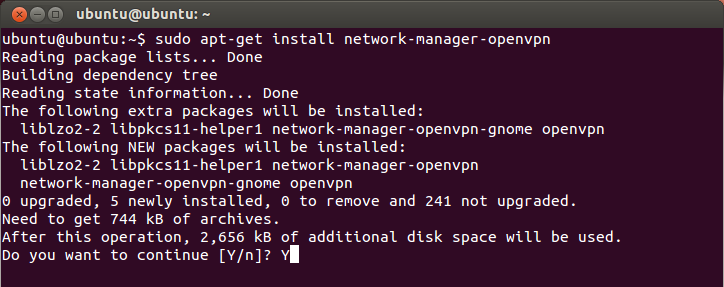
3. Type Y to continue and hit Enter.
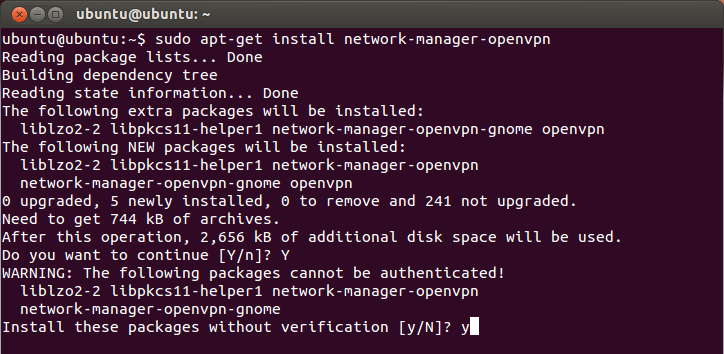
4. Type Y to continue and hit Enter.
5. Download the BTGuard CA certificate btguard.ca.crt
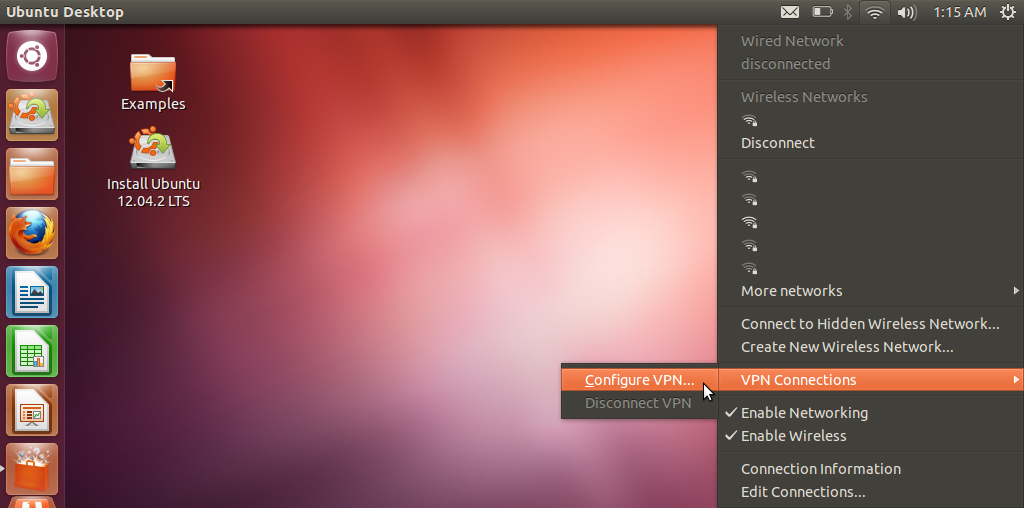
6. Click on the Network icon in the top right corner and go to VPN Connections > Configure VPN....
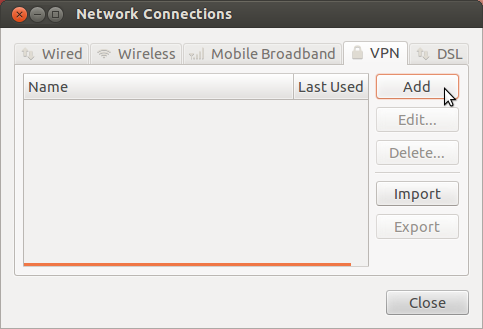
7. Click on Add.
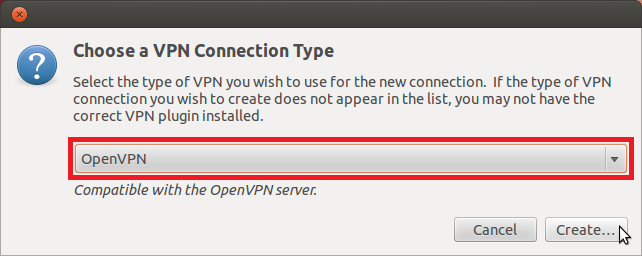
8. Select OpenVPN and hit Create.
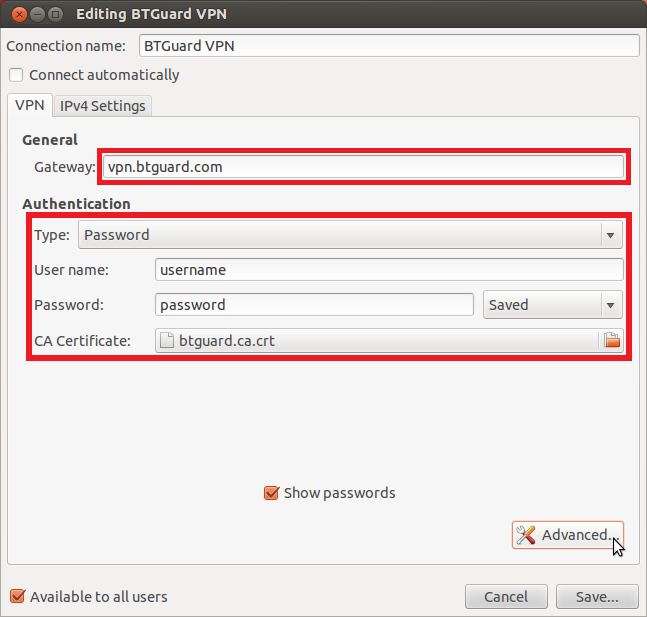
9. Enter the following information:
Gateway: vpn.btguard.com
Optional: To manually select your server location, please use ca.vpn.btguard.com for Canada or eu.vpn.btguard.com for Europe or sg.vpn.btguard.com for Singapore.
Username:
Password: Enter your password.
10. Click on the icon next to CA Certificate and locate the file btguard.ca.crt downloaded previously.
11. Click on the Advanced... button.
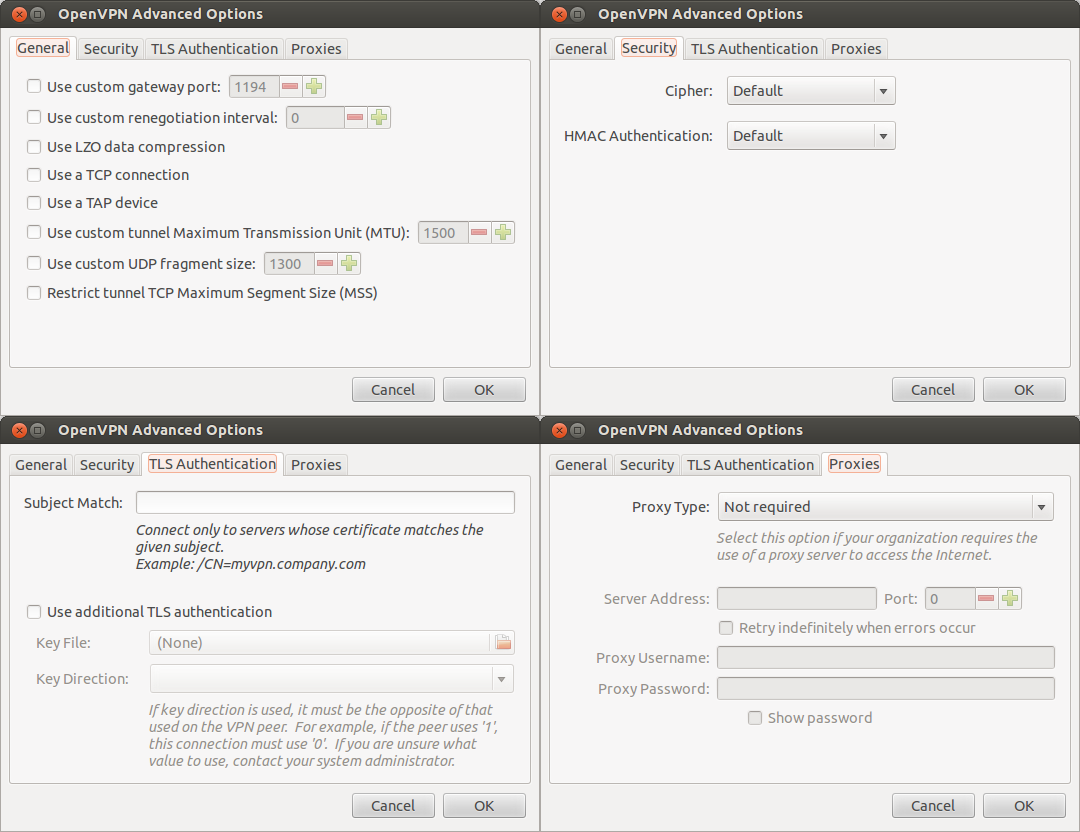
12. Select LZO Compression.
13. Hit OK and Save.
Setup Complete!
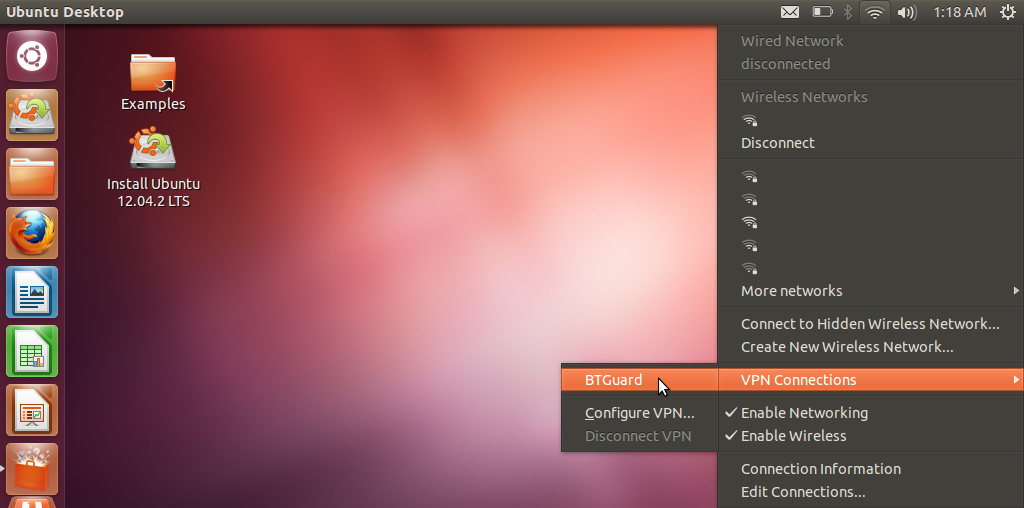
How To Connect
1. Click on the Network icon in the top right corner and go to VPN Connections > BTGuard....