Difference between revisions of "OpenVPN Tomato"
| (One intermediate revision by the same user not shown) | |||
| Line 50: | Line 50: | ||
Checkmark '''Redirect Internet traffic'''<br/> | Checkmark '''Redirect Internet traffic'''<br/> | ||
Accept DNS configuration: '''Strict'''<br/> | Accept DNS configuration: '''Strict'''<br/> | ||
| − | Encryption cipher: ''' | + | Encryption cipher: '''AES-256-CBC'''<br/> |
Compression: '''Disabled'''<br/> | Compression: '''Disabled'''<br/> | ||
| + | TLS Renegotiation Time: '''-1'''<br/> | ||
| + | Connection retry: '''30'''<br/> | ||
Leave '''Verify server certificate (tls-remote)''' unchecked.<br/> | Leave '''Verify server certificate (tls-remote)''' unchecked.<br/> | ||
Custom Configuration:<br/> | Custom Configuration:<br/> | ||
Latest revision as of 21:46, 5 August 2020
Setup Instructions
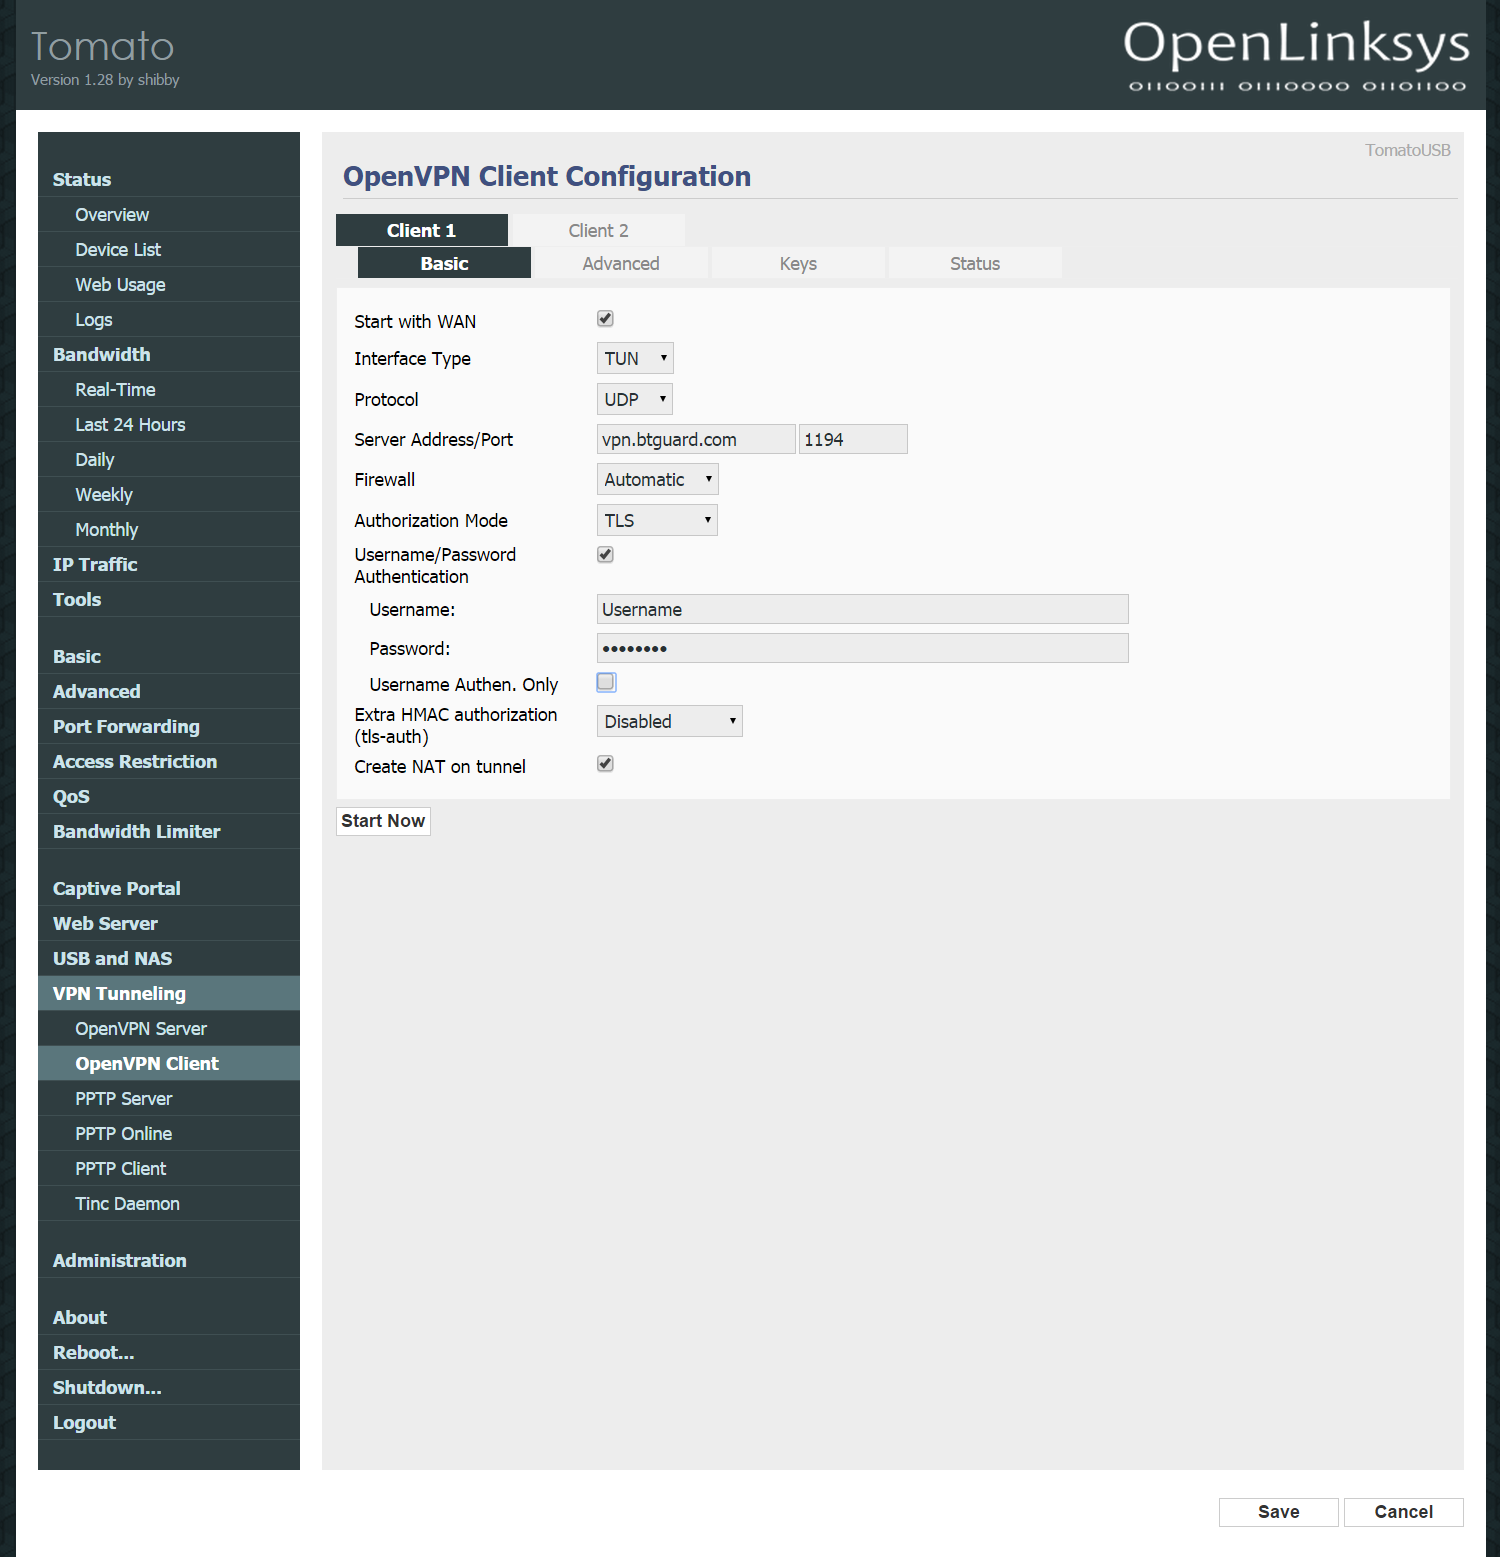
1. Connect to http://192.168.1.1/
2. Click on VPN Tunneling > OpenVPN Client > Client 1 > Basic.
3. Fill in the following:
Checkmark Start with WAN
Interface Type: TUN
Protocol: UDP (switch to TCP if UDP doesn't work)
Server Address: vpn.btguard.com, Port: 1194
Firewall: Automatic
Authorization Mode: TLS
Checkmark Username/Password Authentication
Username:
Password:
Both username and password are case sensitive. Make sure not to add/forget Capital Letters.
Leave Username Authen. Only unchecked.
Extra HMAC authorization (tls-auth): Disabled
Checkmark Create NAT on tunnel
4. Hit Save
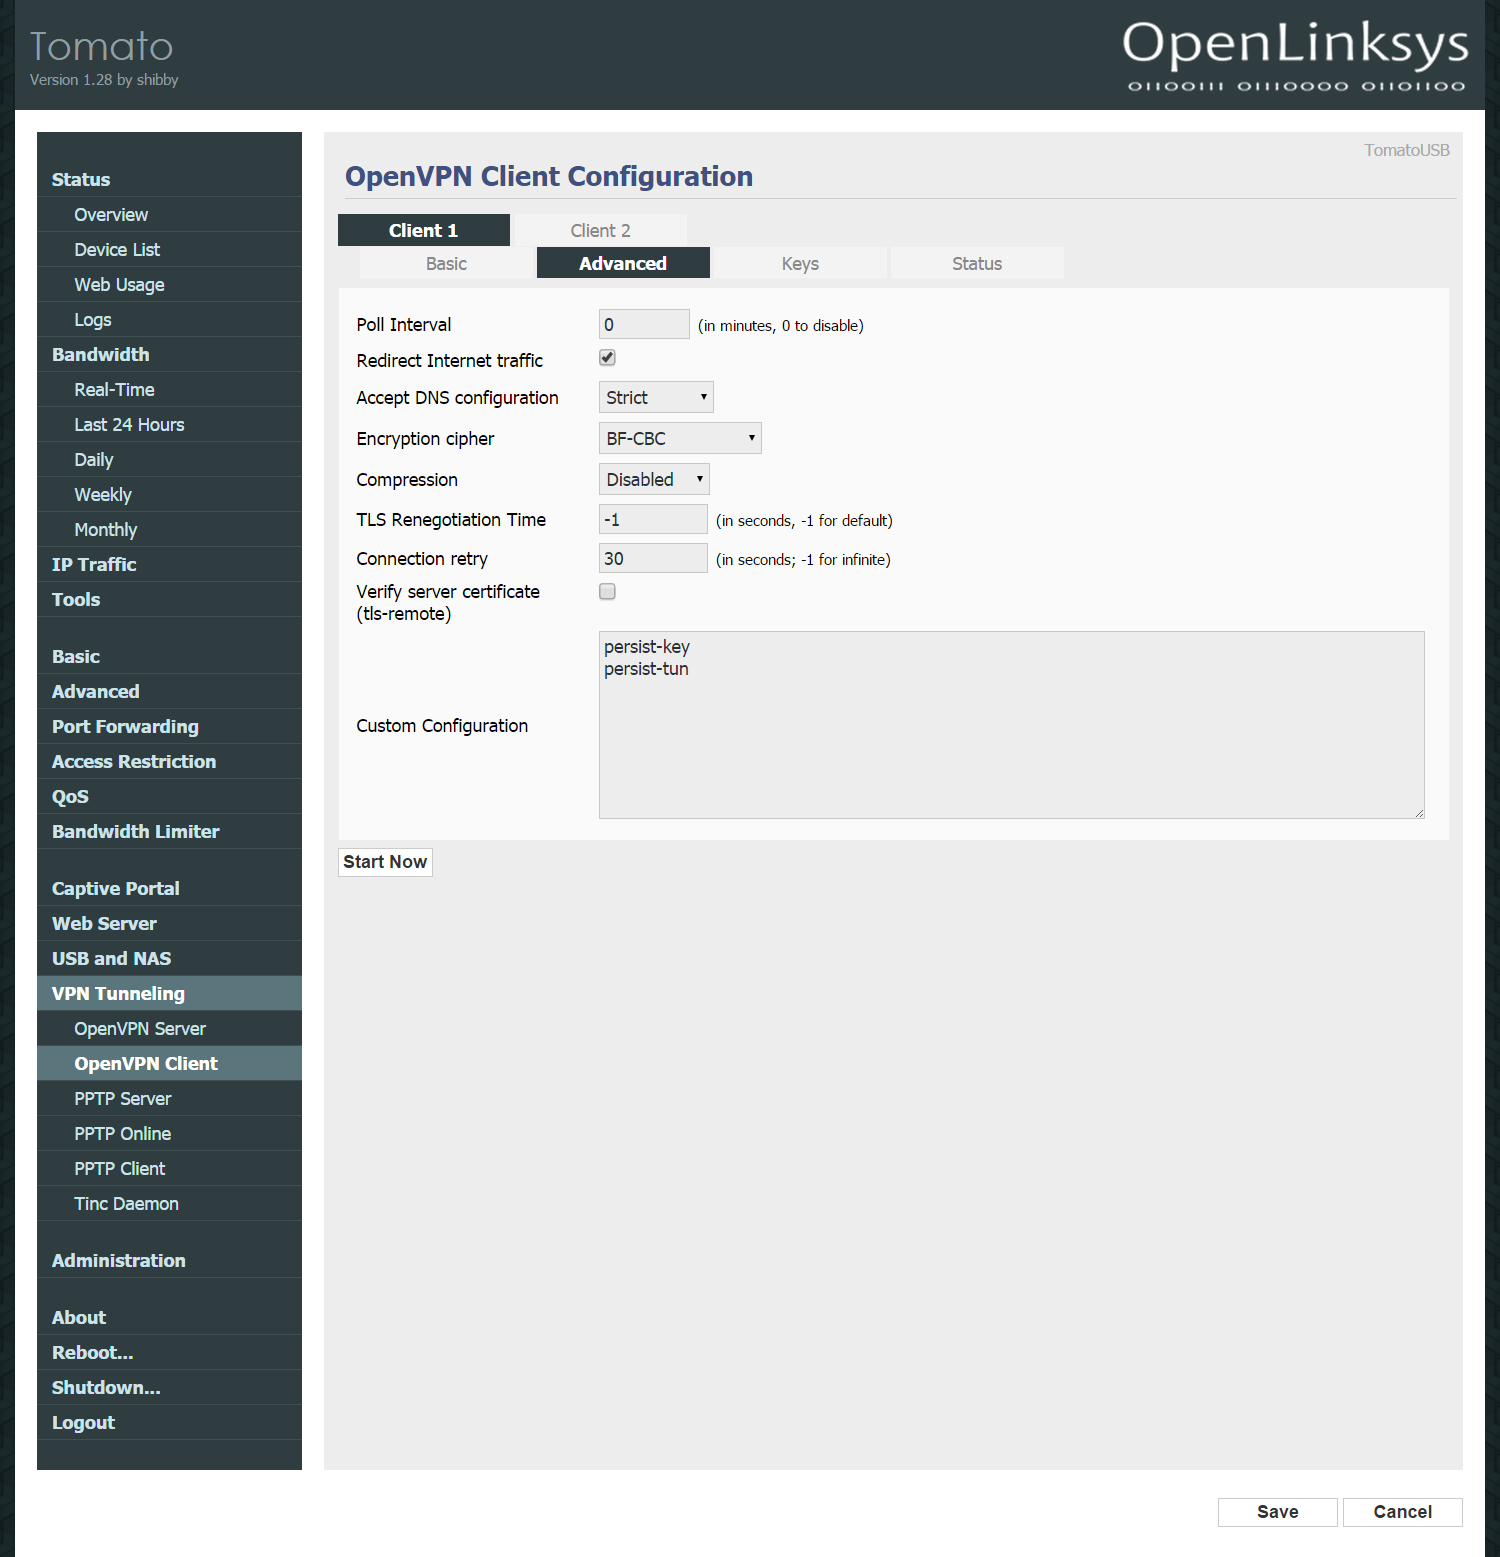
5. Got to the Advanced tab.
6.Fill in the following:
Checkmark Redirect Internet traffic
Accept DNS configuration: Strict
Encryption cipher: AES-256-CBC
Compression: Disabled
TLS Renegotiation Time: -1
Connection retry: 30
Leave Verify server certificate (tls-remote) unchecked.
Custom Configuration:
persist-key
persist-tun
7.Hit Save


