Difference between revisions of "PPTP Windows 8.1"
| (2 intermediate revisions by the same user not shown) | |||
| Line 8: | Line 8: | ||
<p> | <p> | ||
== Setup Instructions == | == Setup Instructions == | ||
| − | 1. Click Start and type: '''network and sharing'''<br/> | + | 1. Click Start and type: '''network and sharing'''<br/><br/> |
2. Select '''Network and Sharing Center'''<br/> | 2. Select '''Network and Sharing Center'''<br/> | ||
</p> | </p> | ||
| Line 70: | Line 70: | ||
<p> | <p> | ||
6. Internet address: '''vpn.btguard.com'''<br/> | 6. Internet address: '''vpn.btguard.com'''<br/> | ||
| − | ''Optional: To manually select your server location, please use '''ca.vpn.btguard.com''' for Canada or '''eu.vpn.btguard.com''' for Europe or sg.vpn.btguard.com for Singapore.''<br/> | + | ''Optional: To manually select your server location, please use '''ca.vpn.btguard.com''' for Canada or '''eu.vpn.btguard.com''' for Europe or '''sg.vpn.btguard.com''' for Singapore.''<br/><br/> |
| − | 7. Destination name: '''BTGuard VPN'''<br/> | + | 7. Destination name: '''BTGuard VPN'''<br/><br/> |
8. Click '''Create'''.<br/><br/> | 8. Click '''Create'''.<br/><br/> | ||
9. Disable IPv6 for your Internet connection:<br/> | 9. Disable IPv6 for your Internet connection:<br/> | ||
| Line 95: | Line 95: | ||
<div class="wrapleft"> | <div class="wrapleft"> | ||
<div class="left"> | <div class="left"> | ||
| − | <span class="plainlinks">[https://btguard.com/images/ | + | <span class="plainlinks">[https://wiki.btguard.com/images/pptp_win8.1_6a.png https://wiki.btguard.com/images/pptp_win8.1_6a.png]</span> |
</div> | </div> | ||
</div> | </div> | ||
Latest revision as of 13:59, 31 October 2013
Setup Instructions
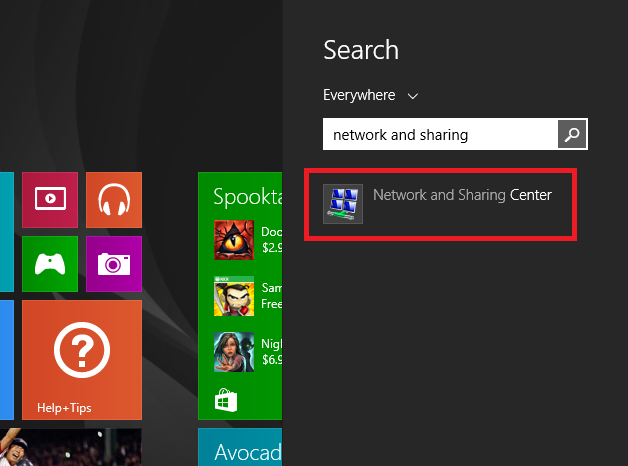
1. Click Start and type: network and sharing
2. Select Network and Sharing Center
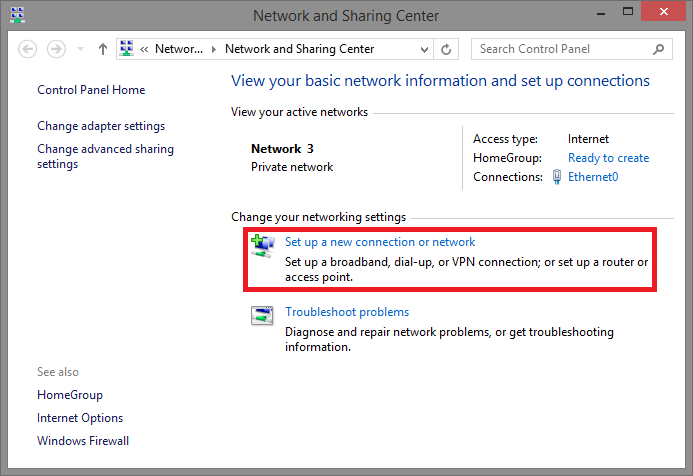
3. Click on Set up a new connection or network.
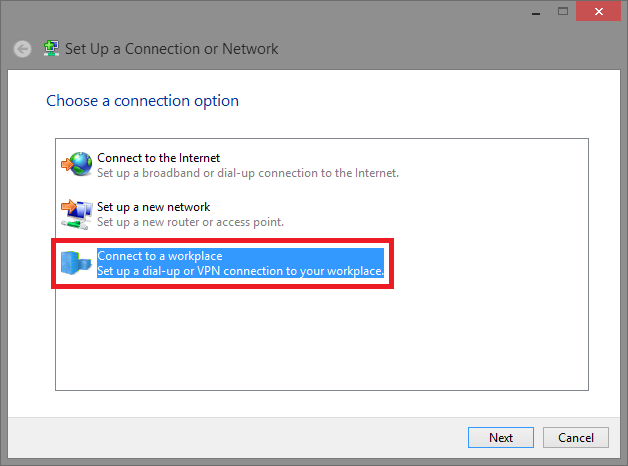
4. Select Connect to a workplace then hit Next.
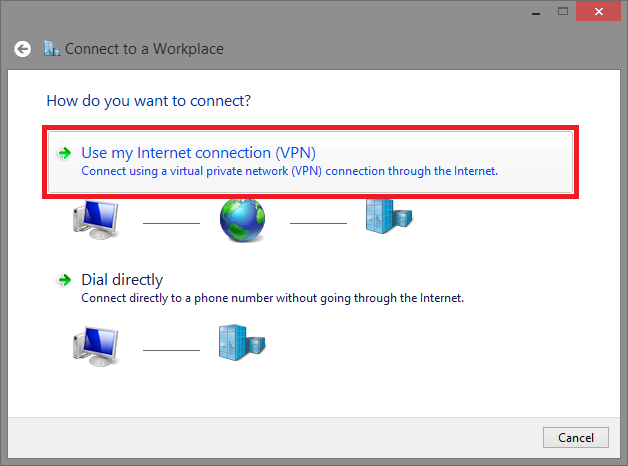
5. Click on Use my Internet connection (VPN).
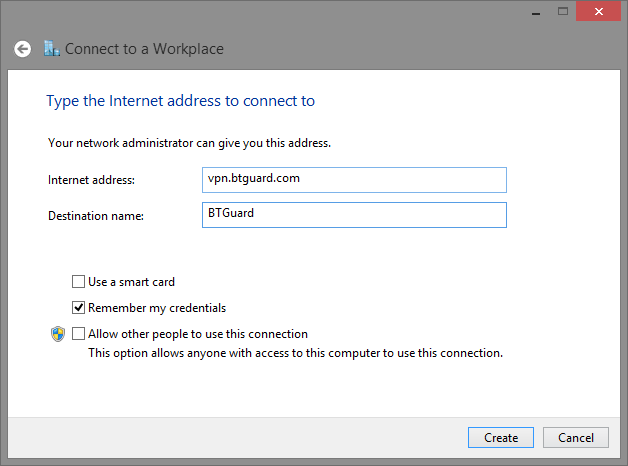
6. Internet address: vpn.btguard.com
Optional: To manually select your server location, please use ca.vpn.btguard.com for Canada or eu.vpn.btguard.com for Europe or sg.vpn.btguard.com for Singapore.
7. Destination name: BTGuard VPN
8. Click Create.
9. Disable IPv6 for your Internet connection:
Download patch, extract, and run DisableIPv6.reg.
Setup complete!
How To Connect
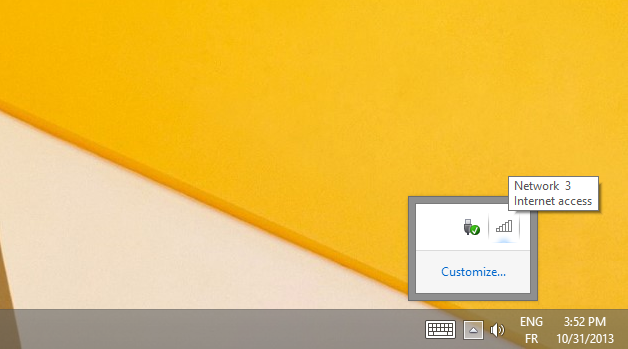
1. Click on your Network icon in the notification area (bottom right).
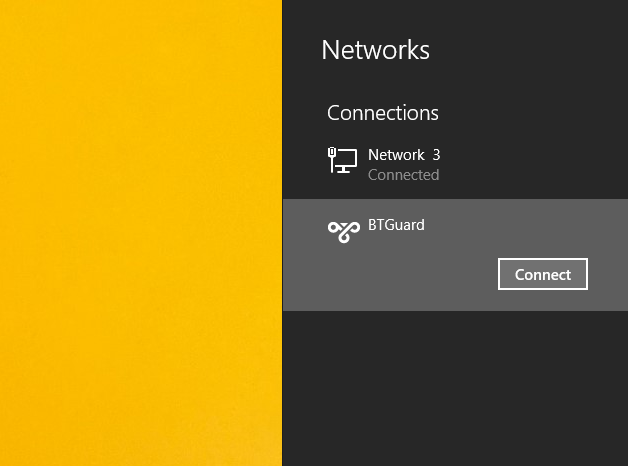
2. Click Connect on the BTGuard connection.
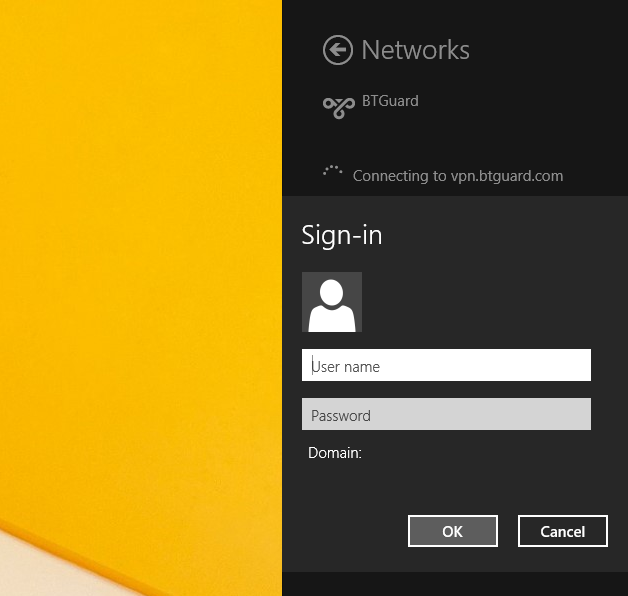
3. Enter your username & password then click Connect
Both username and password are case sensitive. Make sure not to add/forget Capital Letters.
You are now connected!